Why You’ll Love This Recipe
If you’re a chocolate lover, this Brownie Refrigerator Cake is the dessert of your dreams. It combines the best of two worlds — fudgy brownies and creamy layers — all chilled to perfection for an indulgent treat that melts in your mouth. Imagine rich brownie layers topped with smooth whipped cream, silky chocolate pudding, and a touch of chocolate ganache. It’s decadent yet refreshingly cool, making it ideal for any season. I once made this using espresso powder in the brownie layer, and it beautifully deepened the chocolate flavor. Whether you’re hosting a dinner party, celebrating a birthday, or simply craving something sweet, this make-ahead dessert is guaranteed to impress.
Print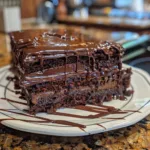
Brownie Refrigerator Cake: A Rich, Chilled Dessert You’ll Crave Year-Round
- Total Time: 2 hours 45 minutes (including chilling time)
- Yield: 12 servings
- Diet: Vegetarian
Description
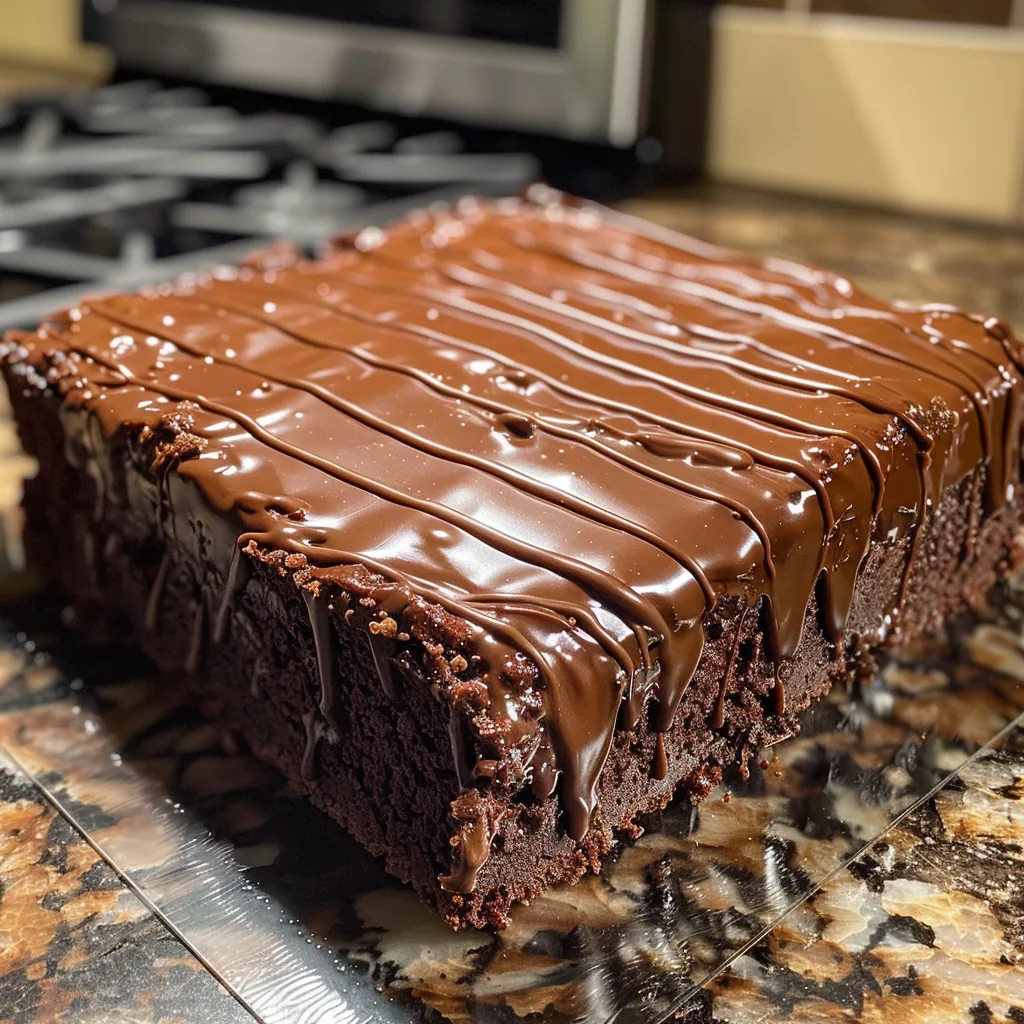
This Brownie Refrigerator Cake is a rich, no-fuss dessert made with layers of fudgy brownie, creamy chocolate pudding, and whipped topping. Chilled to perfection, it’s a decadent treat ideal for parties or summer gatherings.
Ingredients
- 1 box brownie mix (plus ingredients listed on the package)
- 2 cups cold milk
- 1 package (3.9 oz) instant chocolate pudding mix
- 1 container (8 oz) whipped topping, thawed
- 1/2 cup chocolate chips or shaved chocolate (optional, for topping)
- 1/4 cup chopped nuts (optional)
Instructions
- Prepare the brownie mix according to the package directions in a 9×13-inch baking dish. Allow brownies to cool completely.
- In a medium bowl, whisk together milk and chocolate pudding mix for 2 minutes, then let it sit for 5 minutes to thicken.
- Spread the pudding evenly over the cooled brownies.
- Top with a layer of whipped topping, spreading evenly to cover the pudding.
- Sprinkle with chocolate chips or nuts if desired.
- Refrigerate for at least 2 hours before serving to allow layers to set and flavors to meld.
- Slice into squares and serve chilled.
Notes
- Make sure brownies are completely cool before adding pudding to prevent melting.
- For extra flavor, drizzle with chocolate or caramel sauce before serving.
- Store covered in the refrigerator for up to 4 days.
- Prep Time: 15 minutes
- Cook Time: 30 minutes
- Category: Dessert
- Method: No-Bake / Chilled
- Cuisine: American
Ingredients
(Tip: You can find the complete list of ingredients and their measurements in the recipe card below.)
Brownie mix or homemade brownie base – Forms the foundation of the dessert. Use your favorite brownie mix or make it from scratch for a rich, chewy base. Bake it just until set — slightly underbaked gives that perfect fudgy texture.
Instant chocolate pudding mix – Adds a luscious, creamy chocolate layer that complements the dense brownie perfectly. Choose a high-quality mix for the best flavor.
Milk – Used to prepare the pudding. Whole milk gives the richest texture, but 2% works well too.
Whipped topping or homemade whipped cream – Brings lightness and contrast to the deep chocolate flavors. Homemade whipped cream gives a fresher, less sweet result.
Cream cheese – Adds tang and creaminess when blended with the whipped layer, making the dessert luxuriously smooth.
Powdered sugar – Sweetens the cream cheese layer and balances the overall richness.
Vanilla extract – Enhances every layer with a subtle warmth and depth of flavor.
Chocolate chips or chopped chocolate – Melted for the final ganache layer or sprinkled between layers for added texture.
Butter – Used in the ganache for a silky finish and shine.
Cocoa powder (optional) – For dusting on top as a beautiful garnish with a hint of extra chocolate flavor.
Directions
Begin by baking the brownie base according to your recipe or package instructions in a rectangular baking dish. Allow it to cool completely before assembling the cake. Cooling ensures clean layers and prevents the creamy toppings from melting into the brownie.
While the brownie cools, prepare the chocolate pudding mix with cold milk according to package directions. Refrigerate it for at least 10 minutes to thicken. In another bowl, beat cream cheese and powdered sugar together until smooth. Fold in whipped topping and vanilla extract to create a light, creamy mixture.
Once the brownie base is cool, spread the cream cheese mixture evenly over it. Next, spoon the chilled chocolate pudding over the cream layer, spreading gently with a spatula. Top with an additional layer of whipped topping for a cloud-like finish. For a truly decadent touch, drizzle melted chocolate or ganache on top and sprinkle with chocolate shavings or cocoa powder.
Cover and refrigerate for at least 4 hours, or overnight for best results. Slice into squares and serve chilled — each bite offers a perfect balance of rich brownie and cool, creamy layers.
Equipment needed :
Must-Have Tools to Get Rolling
Here’s what you’ll want to have on hand:
Silicone Spatula – Durable, heat-resistant silicone spatula perfect for mixing, scraping, and spreading. Gentle on non-stick cookware and easy to clean.
Large pot – You’ll need this to boil the whole cabbage head and soften the leaves.
large bowl –Spacious, durable large bowl ideal for mixing, serving, or food preparation. Made from sturdy material and easy to clean.
Sharp knife – For coring the cabbage and slicing out the thick stem in each leaf. A paring knife works best.
Mixing bowl – A big bowl makes it easier to combine your meat and rice filling evenly.
Cutting board – For prepping cabbage leaves and rolling them like a pro.
9×13-inch baking dish – Ideal size to fit your rolled cabbage leaves snugly and prevent them from unraveling.
knife – A sharp, durable kitchen knife perfect for slicing, chopping, and dicing with ease
Servings and timing
This recipe serves 12 generous portions.
Prep time: 25 minutes
Bake time: 25 minutes
Chill time: 4 hours (or overnight)
Total time: 5 hours
Storage/reheating
Keep the cake covered in the refrigerator for up to 5 days. It actually tastes even better the next day as the flavors meld together. This dessert should not be reheated — it’s meant to be enjoyed cold. If you want to prepare it ahead, assemble the layers and add the final whipped topping just before serving for a fresher look.

Variations and Customizations
Mocha Brownie Refrigerator Cake
Add 1 tablespoon of espresso powder to the brownie batter and a dash to the pudding for a sophisticated coffee-chocolate twist.
Peanut Butter Dream
Swirl a layer of peanut butter between the cream cheese and pudding layers for a nutty, rich flavor combination.
Oreo Crunch
Crush Oreo cookies and sprinkle them between layers for extra texture and a cookies-and-cream vibe.
Mint Chocolate Layer
Add peppermint extract to the cream layer and top with crushed peppermint candies for a festive version.
Nutty Delight
Add toasted walnuts or pecans to the brownie layer for a crunchy bite.
Caramel Drizzle Cake
Drizzle caramel sauce over each layer and finish with sea salt for a sweet-and-salty experience.
White Chocolate Elegance
Use white chocolate pudding and shavings for a stunning variation that’s both creamy and elegant.
Berry Bliss
Add a layer of sliced strawberries or raspberries between the cream and pudding for a fruity freshness.
Vegan Version
Use plant-based milk, dairy-free whipped topping, and vegan brownies for a completely vegan-friendly dessert.
Individual Servings
Assemble the dessert in small cups or jars for a charming, portion-controlled presentation perfect for parties.
FAQs
Can I make this cake ahead of time?
Yes, it’s even better when made a day ahead — the flavors meld beautifully overnight.
Do I need to chill it for the full 4 hours?
Yes, chilling helps the layers set properly and enhances the texture.
Can I use homemade brownies?
Absolutely. Homemade brownies make the dessert even richer and more flavorful.
Can I substitute whipped topping with real whipped cream?
Yes, just make sure it’s stabilized with a bit of powdered sugar.
What if I don’t have instant pudding mix?
You can make homemade chocolate pudding, just ensure it’s fully cooled before layering.
How do I make the ganache topping?
Melt equal parts chocolate and butter over low heat until smooth, then drizzle over the top.
Can I freeze this cake?
It’s best enjoyed fresh, but you can freeze it for up to a month. Thaw overnight in the fridge.
Can I add fruit?
Yes, sliced strawberries or raspberries make an excellent addition between layers.
How do I keep the layers from mixing?
Ensure each layer is chilled slightly before adding the next for clean, defined layers.
Can I use dark chocolate instead of milk chocolate?
Yes, dark chocolate adds a more intense, less sweet flavor that balances the creamy layers.
Conclusion
This Brownie Refrigerator Cake is the ultimate make-ahead dessert — rich, creamy, and wonderfully refreshing. It delivers layers of texture and flavor, from fudgy brownie to smooth chocolate pudding and airy whipped cream. Perfect for holidays, parties, or a luxurious family dessert, it’s both simple to prepare and guaranteed to impress. Once you try this chilled chocolate masterpiece, it’s bound to become a staple in your dessert repertoire.
Hungry for more? Visit our website for full recipes and follow us on Pinterest for daily foodie inspo you’ll love to pin!