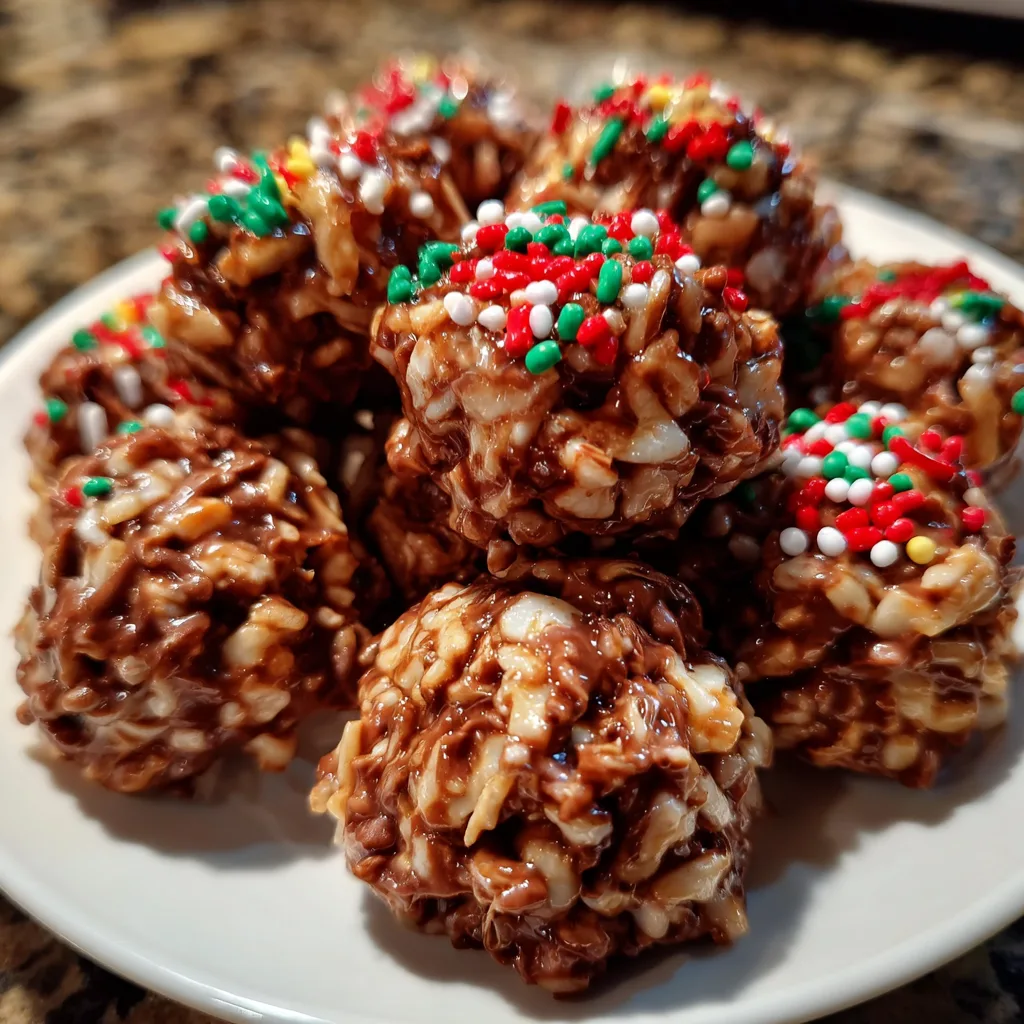
These Christmas Chocolate Rice Krispie Balls are the perfect combination of chewy, crispy, and chocolatey goodness. They’re easy to make, no-bake, and bursting with holiday cheer—ideal for parties, cookie trays, or gifting. Each bite has that satisfying crunch of Rice Krispies wrapped in rich chocolate and festive sprinkles. I tried these once with white chocolate drizzle and crushed candy canes for a peppermint twist—they were gone within minutes! Whether you make them with the kids or as a last-minute dessert, these little bites of joy bring holiday magic to every table.
Why You’ll Love This Recipe
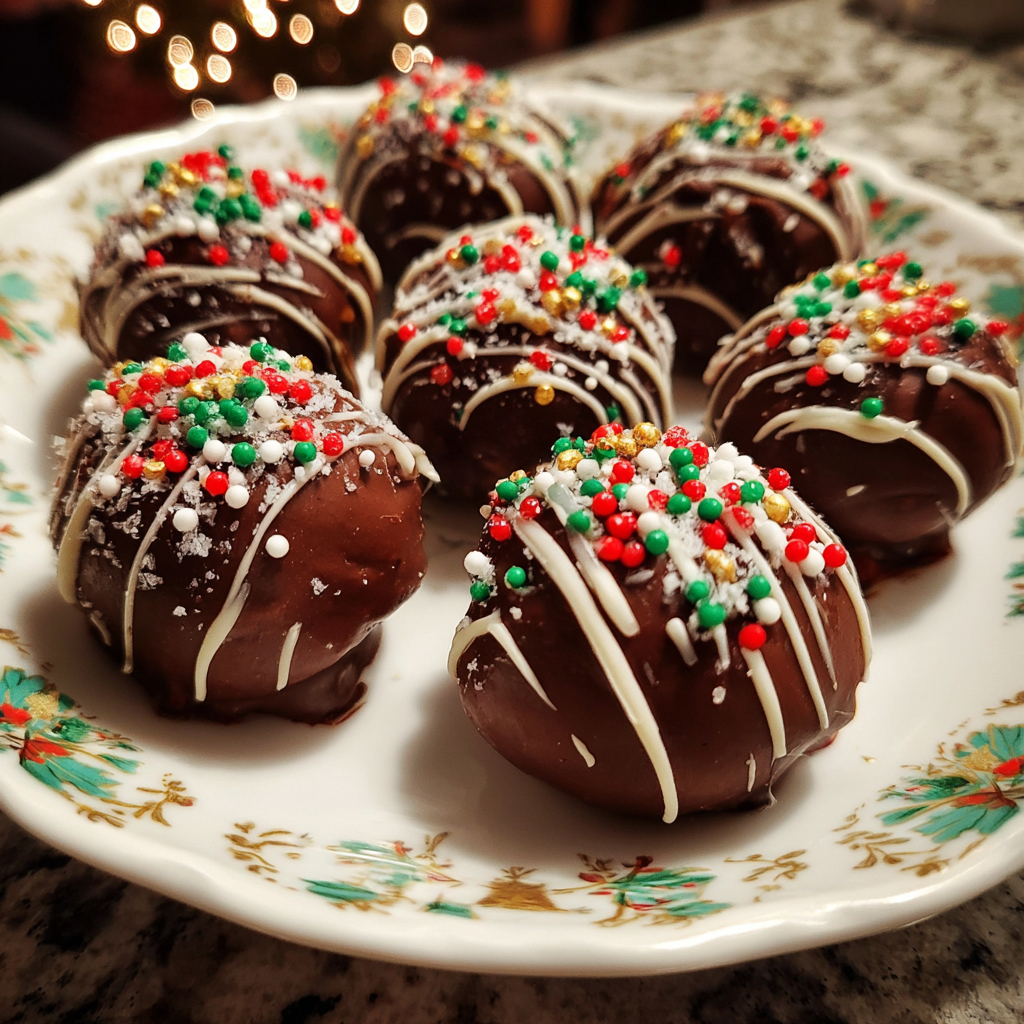
This recipe is as simple as it is delicious. It requires only a handful of ingredients, no oven time, and delivers that nostalgic homemade candy flavor. They’re perfect for busy holiday schedules and can be customized with sprinkles, nuts, or flavored chips. Plus, they look beautiful on dessert platters—bright, glossy, and irresistibly festive. Make a batch to share, but don’t be surprised if you end up keeping a few just for yourself!
Print
Christmas Chocolate Rice Krispie Balls – A Festive, No-Bake Holiday Treat
- Total Time: 20 minutes
- Yield: 24 balls
- Diet: Vegetarian
Description
Christmas Chocolate Rice Krispie Balls are festive, no-bake treats made with gooey marshmallows, crispy rice cereal, and rich chocolate. Rolled into bite-sized balls and decorated with holiday sprinkles, they’re perfect for cookie trays, gifting, or a fun holiday activity with kids.
Ingredients
- 3 cups Rice Krispies cereal
- 1/2 cup unsalted butter
- 1 (10 oz) bag mini marshmallows
- 1/2 teaspoon vanilla extract
- 1 1/2 cups semi-sweet or milk chocolate chips
- 1 tablespoon coconut oil or shortening
- 1/4 cup festive sprinkles (red, green, and white)
Instructions
- Line a baking sheet with parchment paper.
- In a large saucepan over medium heat, melt butter. Add marshmallows and stir continuously until melted and smooth.
- Remove from heat and stir in vanilla extract, then quickly mix in Rice Krispies cereal until fully coated.
- Let mixture cool slightly until it’s easy to handle but still warm. Grease your hands lightly with butter and roll mixture into 1-inch balls. Place on the prepared baking sheet.
- In a microwave-safe bowl, melt chocolate chips with coconut oil in 20-second intervals, stirring between each until smooth.
- Dip each Rice Krispie ball halfway or fully into melted chocolate, then place back on the parchment paper.
- Immediately top with Christmas sprinkles before chocolate hardens.
- Chill in the refrigerator for 20–30 minutes to set. Store in an airtight container.
Notes
- Add crushed candy canes or mini M&Ms to the mixture for extra holiday fun.
- Use white chocolate or dark chocolate for variety.
- For dairy-free, use vegan butter and dairy-free chocolate chips.
- These make great edible gifts — package in festive tins or treat bags!
- Prep Time: 15 minutes
- Cook Time: 5 minutes
- Category: Dessert
- Method: No-Bake
- Cuisine: American
Ingredients
(Tip: You can find the complete list of ingredients and their measurements in the recipe card below.)
Rice Krispies Cereal
The crispy, airy base that gives these treats their signature crunch.
Semi-Sweet or Milk Chocolate Chips
Melted chocolate coats each ball, adding sweetness and a smooth, rich finish.
Butter
Helps bind the mixture together and adds a touch of richness.
Mini Marshmallows
Melted marshmallows act as the glue that holds everything together while keeping the texture chewy.
Vanilla Extract
Adds a touch of warmth and depth to the flavor.
Salt
Balances the sweetness and enhances the chocolate flavor.
Christmas Sprinkles or Crushed Candy Canes
For a festive, decorative touch—use red, green, white, or even metallic sprinkles for extra sparkle.
Optional Add-ins:
Peanut butter, chopped nuts, or white chocolate drizzle for added variety.
Directions
- Prepare your setup. Line a baking sheet with parchment paper and set aside.
- Melt the butter and marshmallows. In a large saucepan over medium heat, melt butter. Add mini marshmallows and stir until fully melted and smooth.
- Add vanilla and salt. Stir in vanilla extract and a pinch of salt to balance the sweetness.
- Mix in Rice Krispies. Remove from heat and quickly fold in Rice Krispies cereal, stirring gently until fully coated.
- Shape the balls. While the mixture is still warm (but not hot), scoop and roll into 1-inch balls using lightly buttered hands or a small cookie scoop. Place on the prepared baking sheet. Let them cool and firm up for about 15 minutes.
- Melt the chocolate. In a microwave-safe bowl, melt chocolate chips in 20-second intervals, stirring between each, until smooth and glossy.
- Coat the balls. Dip each Rice Krispie ball into the melted chocolate using a fork or skewer. Tap off the excess and place them back on the parchment paper.
- Decorate. While the chocolate is still wet, top with Christmas sprinkles, crushed candy canes, or a drizzle of white chocolate.
- Set. Let them rest at room temperature or refrigerate for 15–20 minutes until the chocolate hardens.
Equipment needed :
Must-Have Tools to Get Rolling
Here’s what you’ll want to have on hand:
Silicone Spatula – Durable, heat-resistant silicone spatula perfect for mixing, scraping, and spreading. Gentle on non-stick cookware and easy to clean.
Large pot – You’ll need this to boil the whole cabbage head and soften the leaves.
large bowl –Spacious, durable large bowl ideal for mixing, serving, or food preparation. Made from sturdy material and easy to clean.
Sharp knife – For coring the cabbage and slicing out the thick stem in each leaf. A paring knife works best.
Mixing bowl – A big bowl makes it easier to combine your meat and rice filling evenly.
Cutting board – For prepping cabbage leaves and rolling them like a pro.
9×13-inch baking dish – Ideal size to fit your rolled cabbage leaves snugly and prevent them from unraveling.
knife – A sharp, durable kitchen knife perfect for slicing, chopping, and dicing with eas
Servings and timing
This recipe makes 24–30 balls, depending on size.
Preparation time: 15 minutes
Cooling time: 20 minutes
Total time: 35 minutes
Storage/reheating
Store the finished balls in an airtight container at room temperature for up to 5 days or in the refrigerator for up to 2 weeks. To freeze, place them in a single layer on a baking sheet until solid, then transfer to a freezer-safe bag for up to 2 months. Let thaw at room temperature before serving.
Variations and Customizations
White Chocolate Peppermint: Use white chocolate coating and top with crushed candy canes for a festive flavor.
Peanut Butter Twist: Mix ¼ cup of creamy peanut butter into the melted marshmallow mixture for a nutty touch.
Coconut Delight: Roll finished balls in shredded coconut before the chocolate sets.
Dark Chocolate Lovers: Use dark chocolate chips for a more intense cocoa flavor.
Nutty Crunch: Add finely chopped almonds, pecans, or peanuts for extra texture.
Caramel Drizzle: Once cooled, drizzle with melted caramel for a sweet, gooey layer.
M&M Magic: Press a mini M&M on top of each ball before the chocolate hardens for extra color.
Holiday Mix: Use red and green candy melts instead of chocolate for a brighter, more playful presentation.
Salted Chocolate: Sprinkle sea salt over the top before the chocolate sets for a sweet-salty combo.
Mini Cup Treats: Spoon the mixture into mini cupcake liners before coating in chocolate for a tidy, bite-sized presentation.
FAQs
Can I make these without marshmallows?
Yes! Substitute ½ cup of peanut butter and ½ cup of honey for a marshmallow-free version.
Can I use white chocolate instead?
Absolutely—just melt and coat as you would with regular chocolate.
Do I need to refrigerate them?
Only if your kitchen is warm; otherwise, room temperature is perfect.
Can I use cocoa-flavored Rice Krispies?
Yes, it gives a double chocolate flavor—delicious for chocolate lovers!
How do I prevent sticky hands when rolling?
Lightly butter or grease your hands before shaping the mixture.
Can I use large marshmallows instead of mini?
Yes, just measure by volume (about 5 cups) and melt slowly for even results.
How do I keep the chocolate shiny?
Don’t overheat it—melt in short bursts and stir often for a glossy finish.
Are these gluten-free?
Yes, as long as you use certified gluten-free Rice Krispies and chocolate.
Can kids help make these?
Definitely! It’s a fun and safe recipe for kids to help with decorating.
How far ahead can I make them?
You can make them up to 2 days before serving—just store in a cool, dry place.
Conclusion
These Christmas Chocolate Rice Krispie Balls are the perfect bite-sized treat for the holidays—simple, festive, and full of nostalgic flavor. With their crunchy texture, creamy chocolate coating, and cheerful sprinkles, they capture the spirit of the season in every bite. Whether you’re gifting them, adding them to a cookie platter, or enjoying them by the fireplace, this is one recipe you’ll want to make every holiday season. Don’t lose it—it’s a keeper for years to come!
Hungry for more? Visit our website for full recipes and follow us on Pinterest for daily foodie inspo you’ll love to pin!