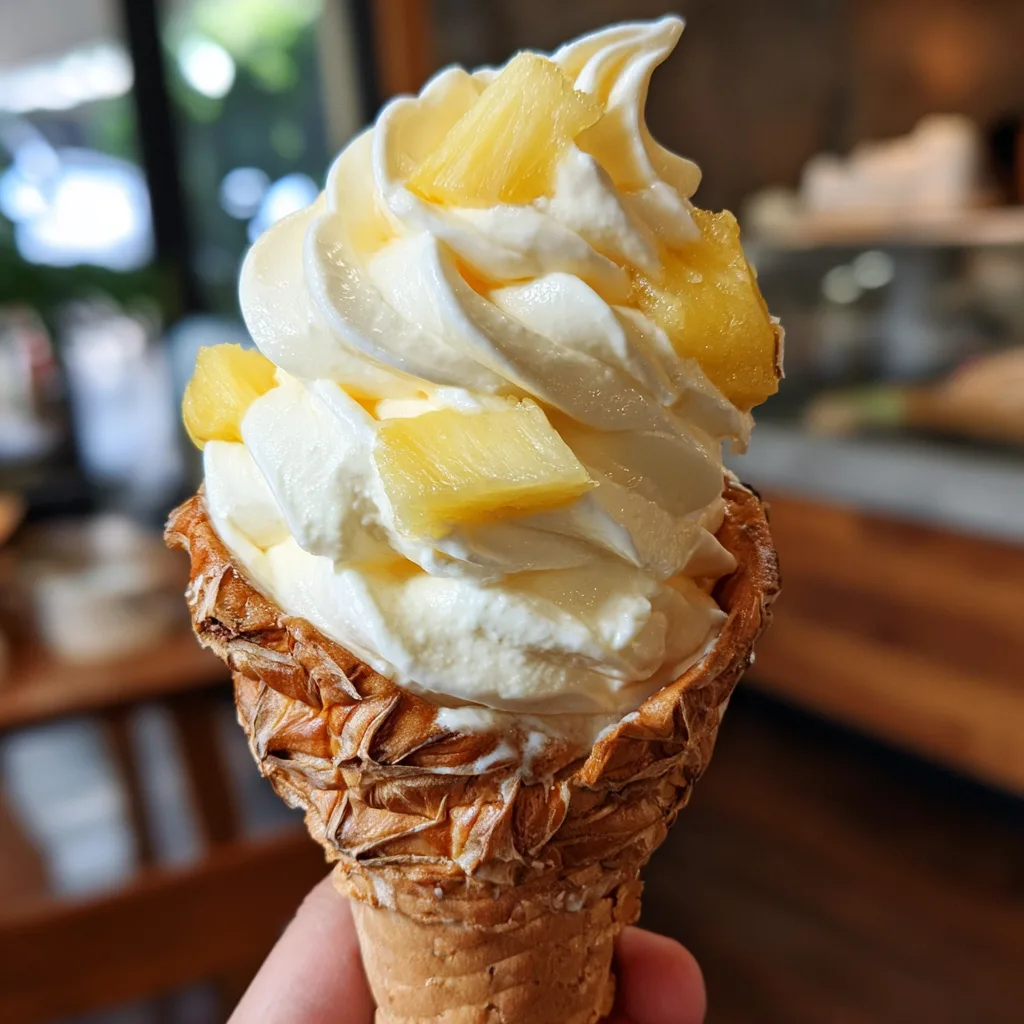
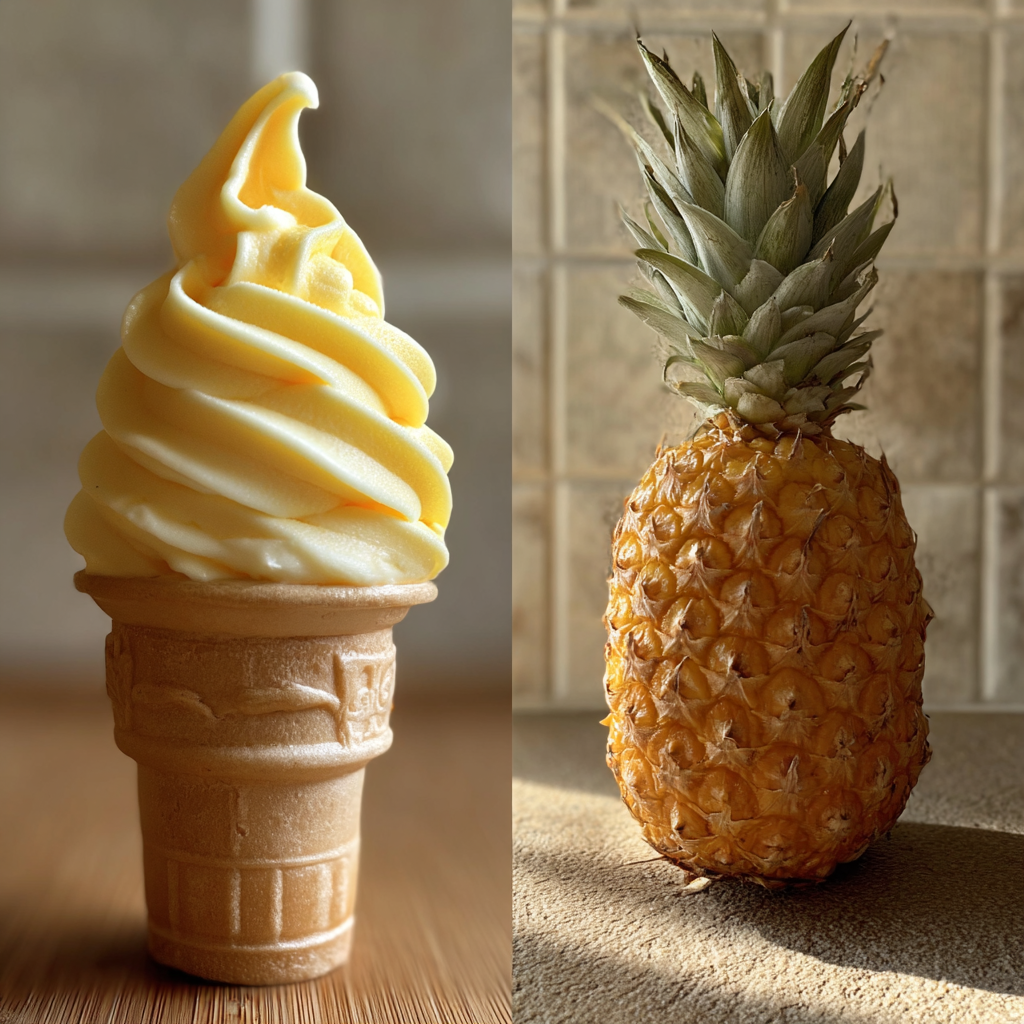
There’s nothing quite like the refreshing taste of pineapple soft serve on a warm day. This homemade version captures that same tropical sweetness you’d find at a theme park, but it’s made right in your own kitchen with simple, wholesome ingredients. It’s light, creamy, and bursting with bright, fruity flavor—perfect for summer picnics, barbecues, or when you just need a sunny pick-me-up. When I first made this recipe, I was surprised at how easy it was to achieve that signature soft texture without an ice cream machine. The natural tartness of pineapple blends beautifully with a touch of sweetness and creaminess, creating a dessert that’s both indulgent and refreshing.
Why You’ll Love This Recipe
Homemade Pineapple Soft Serve Ice Cream is pure tropical bliss in a bowl. It’s quick to make, requires no special equipment, and uses minimal ingredients. The texture is smooth and creamy, while the flavor bursts with pineapple’s natural tang. It’s also dairy-free adaptable, making it a great choice for all dietary preferences. Whether served in a cone, a bowl, or layered with fresh fruit, this recipe brings sunshine to your dessert table.
Print
Homemade Pineapple Soft Serve Ice Cream: A Tropical Treat You Can Make Anytime
- Total Time: 10 mins
- Yield: 2 servings
- Diet: Vegan
Description
This Homemade Pineapple Soft Serve Ice Cream is a creamy, refreshing, and tropical treat inspired by the classic Dole Whip. Made with real pineapple, it’s smooth, sweet, and perfect for a quick summer dessert without the need for an ice cream maker.
Ingredients
- 2 cups frozen pineapple chunks
- 1/2 cup unsweetened coconut milk (or any milk of choice)
- 2 tablespoons honey or maple syrup
- 1 teaspoon vanilla extract
- Pinch of salt
- Fresh pineapple slices for garnish (optional)
Instructions
- Add frozen pineapple chunks, coconut milk, honey, vanilla extract, and salt to a blender or food processor.
- Blend on high until smooth and creamy, stopping to scrape down the sides as needed.
- If the mixture is too thick, add a little more milk — one tablespoon at a time — until desired consistency is reached.
- For a soft-serve texture, serve immediately.
- For a firmer ice cream texture, transfer to a container and freeze for 1–2 hours before serving.
- Garnish with fresh pineapple slices if desired.
Notes
- Use ripe, sweet pineapple for the best flavor.
- You can make it vegan by using maple syrup instead of honey.
- Serve immediately for the classic soft-serve texture or freeze longer for scoopable ice cream.
- Prep Time: 10 mins
- Cook Time: 0 mins
- Category: Dessert
- Method: Blending
- Cuisine: American
Ingredients
(Tip: You can find the complete list of ingredients and their measurements in the recipe card below.)
Frozen pineapple chunks – The star of the show. Use ripe, sweet pineapple for the best flavor and natural creaminess.
Coconut milk or regular milk – Adds smoothness and creaminess to the soft serve. I tried this once with almond milk, and it worked great for a lighter version.
Honey or maple syrup – A natural sweetener that enhances the pineapple’s tropical flavor without overpowering it.
Vanilla extract – Adds depth and a subtle warmth that rounds out the fruit’s acidity.
Lemon juice – Just a splash helps balance the sweetness and brightens the overall flavor.
Salt – A tiny pinch brings out the pineapple’s sweetness and enhances the creamy texture.
Optional topping ideas: toasted coconut flakes, crushed graham crackers, or a drizzle of caramel sauce.
Directions
Start by adding the frozen pineapple chunks to a high-speed blender or food processor. Pulse a few times to break them up.
Add the coconut milk, honey (or maple syrup), vanilla extract, lemon juice, and a pinch of salt. Blend until smooth, pausing to scrape down the sides as needed. The mixture should look thick and creamy—similar to soft-serve consistency.
If the mixture is too thick, add a splash more milk until it reaches your desired texture. For an extra-smooth finish, transfer the mixture to a piping bag fitted with a large star tip and swirl it into serving bowls or cones.
Serve immediately for a true soft-serve experience, or freeze for 30–60 minutes if you prefer a firmer texture. Top with toasted coconut or fresh pineapple for a delightful finishing touch.
Equipment needed :
Must-Have Tools to Get Rolling
Here’s what you’ll want to have on hand:
- Blender or food processor
- Rubber spatula
- Measuring cups and spoons
- Piping bag with star tip (optional, for presentation)
- Serving bowls or cones
Servings and timing
This recipe makes about 4 servings. Preparation takes 10 minutes, and no cooking is required. If you choose to chill it further, allow 30–60 minutes of additional freezing time.
Storage/reheating
Store leftover soft serve in an airtight container in the freezer for up to 2 weeks. Before serving again, let it sit at room temperature for about 10–15 minutes to soften. Stir gently to restore that creamy texture—no reheating needed.
Variations and Customizations
Coconut-Pineapple Bliss – Add shredded coconut to the blend for a tropical texture boost.
Spicy pineapple twist – Mix in a pinch of chili powder or cayenne for a sweet-heat surprise.
Dairy-free version – Use coconut, almond, or oat milk for a creamy vegan option.
Pineapple-banana swirl – Blend in a ripe banana for extra creaminess and natural sweetness.
Minty refresh – Add a few fresh mint leaves to the blender for a cooling flavor.
Cream cheese swirl – Add a spoonful of softened cream cheese for a tangy, dessert-like twist.
Vanilla coconut delight – Add extra vanilla and top with toasted coconut for an island-inspired finish.
Frozen yogurt fusion – Replace milk with Greek yogurt for a protein-rich, tangy version.
Tropical medley – Blend pineapple with mango or passionfruit for a fruity, colorful treat.
Dessert parfait – Layer the soft serve with crushed cookies, whipped cream, or fruit compote for a stunning presentation.
FAQs
1. Can I use canned pineapple instead of frozen?
You can, but the texture won’t be as creamy. Freeze the canned pineapple chunks before blending for best results.
2. Do I need an ice cream maker?
No, this recipe can be made entirely in a blender or food processor.
3. Can I make it dairy-free?
Yes, use coconut milk or another plant-based milk to keep it vegan.
4. What’s the best way to sweeten it?
Honey, maple syrup, or agave all work beautifully—adjust to taste.
5. How do I make it thicker?
Use less milk or freeze the mixture for 30 minutes before serving.
6. Can I use fresh pineapple?
Yes, but freeze it beforehand for the right texture.
7. Why does my soft serve turn icy?
Too much liquid can cause ice crystals. Blend minimally and avoid over-mixing once smooth.
8. Can I add protein powder?
Absolutely—vanilla or unflavored protein powder blends well with the flavors.
9. How long will it keep in the freezer?
Up to two weeks in an airtight container. Let it soften before serving.
10. What can I serve it with?
It pairs wonderfully with grilled fruit, coconut cookies, or a slice of pound cake.
Conclusion
Homemade Pineapple Soft Serve Ice Cream is the perfect blend of simplicity and tropical indulgence. With just a few ingredients and no fancy equipment, you can enjoy a creamy, refreshing dessert that tastes like summer in every spoonful. It’s light, fruity, and endlessly adaptable—whether you make it dairy-free, add fun toppings, or enjoy it plain and pure. This recipe proves that the best treats are often the simplest to make, and once you try it, you’ll find yourself coming back for another swirl of sunshine.
Hungry for more? Visit our website for full recipes and follow us on Pinterest for daily foodie inspo you’ll love to pin!