Creating homemade confections doesn’t have to be complicated, and these Peanut Butter Balls prove exactly that. This recipe is one of those nostalgic classics that shows up at bake sales, holiday platters, and family gatherings because it is simple, quick, and universally enjoyable. What I love most about these treats is how flexible they are. You can keep them as wholesome energy bites or dress them up with a chocolate coating for a more decadent finish. They require no baking, minimal preparation time, and use pantry staples most of us already have on hand. I once made these using almond milk instead of regular milk to loosen the mixture, and it worked beautifully. Whether you are preparing a quick snack for the week or need a last-minute dessert, Peanut Butter Balls offer a delightful balance of sweetness, creaminess, and crunch that makes them truly irresistible.
Why You’ll Love This Recipe
These Peanut Butter Balls strike the perfect balance between convenience and indulgence. With no oven required, they come together quickly and can be adapted to suit various dietary preferences. Their simplicity makes them ideal for both beginners and seasoned home cooks.
Print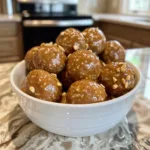
Peanut Butter Balls: A No-Bake Treat Everyone Will Crave
- Total Time: 1 hr 15 mins
- Yield: 24 balls
- Diet: Vegetarian
Description
Simple no-bake peanut butter balls made with peanut butter, oats, and chocolate—perfect as a quick snack or dessert.
Ingredients
- 1 cup creamy peanut butter
- 1/2 cup honey
- 1 teaspoon vanilla extract
- 2 cups rolled oats
- 1/2 cup mini chocolate chips
Instructions
- In a mixing bowl, combine peanut butter, honey, and vanilla extract until smooth.
- Stir in the rolled oats until fully incorporated.
- Fold in the mini chocolate chips.
- Refrigerate the mixture for 20–30 minutes to firm slightly.
- Roll the mixture into 1-inch balls and place on a lined tray.
- Refrigerate for at least 1 hour before serving.
Notes
- Use natural peanut butter for a less sweet result.
- Chill the mixture before rolling to make shaping easier.
- Store in an airtight container in the refrigerator for up to one week.
- Prep Time: 15 mins
- Cook Time: 0 mins
- Category: Snack
- Method: No-Bake
- Cuisine: American
Ingredients
(Tip: You can find the complete list of ingredients and their measurements in the recipe card below.)
Peanut butter
This forms the rich, creamy base of the mixture. It binds all the dry ingredients together while adding depth and nutty flavor. I prefer using a natural creamy peanut butter for a smoother texture, though a standard shelf-stable option works just as well.
Butter
Butter helps soften the mixture, enrich the flavor, and make the peanut butter balls easier to shape. It also contributes to a silky mouthfeel.
Powdered sugar
This sweetens the mixture and provides structure. Powdered sugar blends seamlessly into the peanut butter, preventing any graininess and allowing the balls to hold their shape.
Vanilla extract
A small amount of vanilla elevates the overall flavor, giving the balls a warm aroma and enhancing the sweetness without overwhelming it.
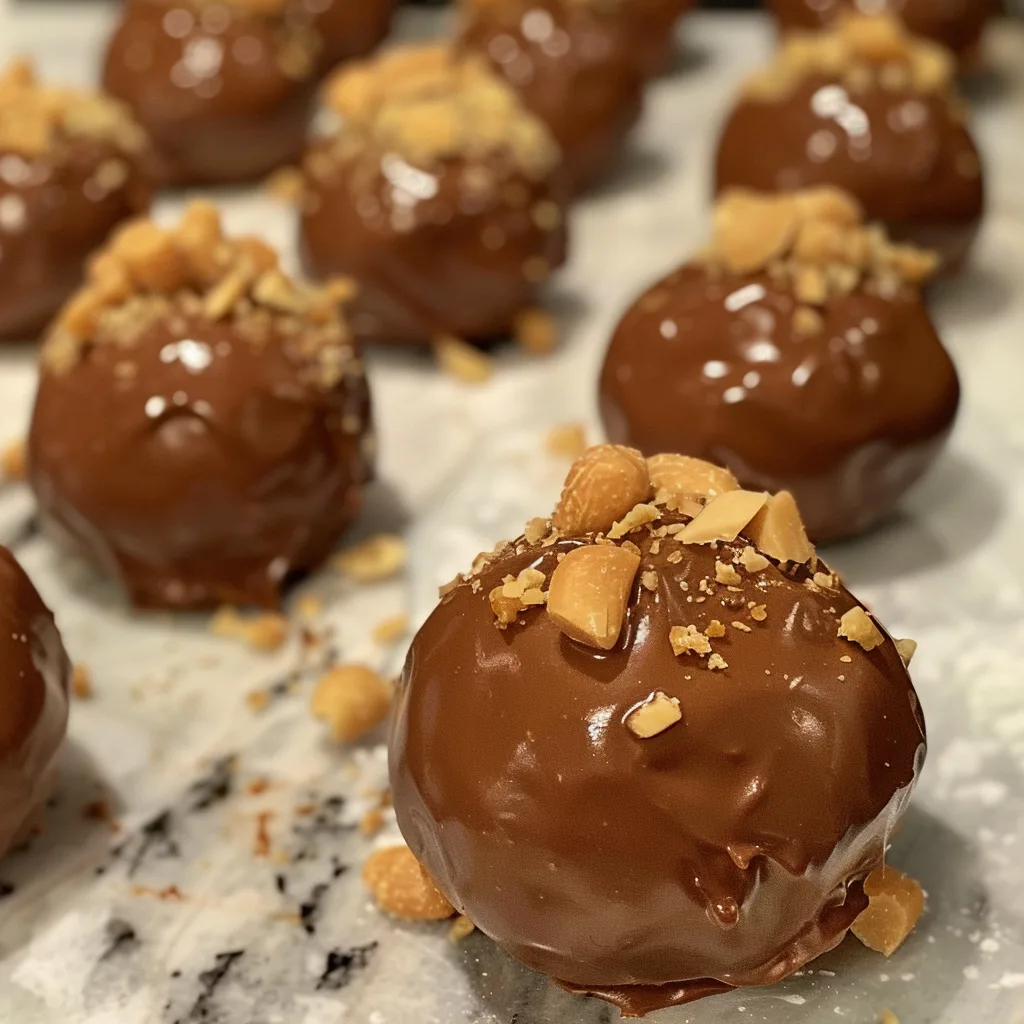
Chocolate chips or melting chocolate
If you choose to dip the balls in chocolate, this will add a pleasant contrast of textures. The crisp shell pairs wonderfully with the soft peanut butter center.
Crispy rice cereal or oats
Depending on the style you prefer, either one creates a bit of crunch. Crispy rice cereal keeps the balls light, while oats add heartiness and a subtle chewiness.
Directions
Begin by combining the peanut butter and softened butter in a large bowl. Mix until the texture becomes smooth and cohesive, which ensures both ingredients will evenly coat the dry elements later on. Add the powdered sugar gradually, stirring thoroughly after each addition to avoid lumps. The mixture should begin to thicken and become easy to handle.
Stir in the vanilla extract, followed by your chosen textural ingredient—either crispy rice cereal or oats. At this stage, the mixture should be firm enough to roll but still pliable. If it feels too soft, a little more powdered sugar will help; if too stiff, you can soften it with a splash of milk.
Using your hands or a small cookie scoop, roll the mixture into uniform balls and place them on a parchment-lined tray. If you are dipping them in chocolate, melt the chocolate gently using a microwave or double boiler. Dip each ball, letting the excess drip off before returning it to the tray. Refrigerate for at least 20 to 30 minutes, or until the chocolate sets and the balls become firm enough to handle.
Equipment needed :
Must-Have Tools to Get Rolling
Here’s what you’ll want to have on hand:
Silicone Spatula – Durable, heat-resistant silicone spatula perfect for mixing, scraping, and spreading. Gentle on non-stick cookware and easy to clean.
Large pot – You’ll need this to boil the whole cabbage head and soften the leaves.
large bowl –Spacious, durable large bowl ideal for mixing, serving, or food preparation. Made from sturdy material and easy to clean.
Sharp knife – For coring the cabbage and slicing out the thick stem in each leaf. A paring knife works best.
Mixing bowl – A big bowl makes it easier to combine your meat and rice filling evenly.
Cutting board – For prepping cabbage leaves and rolling them like a pro.
Full-Size Blender – is a powerful kitchen appliance for making smoothies, soups, and sauces in large batches.
3-in-1 Air Fryer – This versatile 3-in-1 air fryer offers Air Fry for healthier meals with less oil, Bake for bakery-quality desserts and treats, and Reheat to bring leftovers back to life with crispy, flavorful results
Servings and timing
This recipe yields approximately 24 Peanut Butter Balls.
Preparation time: 15 minutes
Chilling time: 30 minutes
Total time: around 45 minutes
Storage/reheating
Store the Peanut Butter Balls in an airtight container in the refrigerator for up to one week. If you prefer to freeze them, place them in a single layer on a tray until solid, then transfer to a freezer-safe bag or container. They can be frozen for up to three months. To serve, simply thaw in the refrigerator. These treats do not require reheating.

Variations and Customizations
Dark chocolate drizzle
A simple drizzle of melted dark chocolate creates a more sophisticated flavor profile without fully coating the balls.
Coconut-coated
Roll the shaped balls in finely shredded coconut for added texture and a hint of tropical sweetness.
Crunchy peanut butter version
Swap creamy peanut butter for crunchy to introduce an extra layer of texture.
Protein-packed
Add a scoop of vanilla or chocolate protein powder to turn them into energy bites suitable for pre- or post-workout snacking.
Nut-free sunflower butter adaptation
For those with nut allergies, sunflower seed butter is an excellent substitute, maintaining the creaminess without sacrificing flavor.
Spiced variation
Add a pinch of cinnamon or nutmeg for a warm, aromatic twist.
Espresso-infused
Mix a small amount of instant espresso powder into the peanut butter for a subtle coffee undertone that pairs beautifully with chocolate.
FAQs
Can I use natural peanut butter in this recipe?
Yes, though you may need to adjust the powdered sugar slightly since natural peanut butter is typically softer.
Do the Peanut Butter Balls need to be refrigerated?
Refrigeration helps them firm up and maintain their shape, especially if they contain chocolate.
Can I make these ahead of time?
Absolutely. They store well in both the refrigerator and freezer.
What type of chocolate works best for dipping?
Melting wafers or high-quality chocolate chips provide the smoothest finish.
Can I replace the butter?
You can use coconut oil as an alternative, though it will change the flavor slightly.
How do I prevent the balls from sticking to my hands?
Chilling the mixture briefly or lightly greasing your hands can help.
Can I add nuts or seeds?
Yes, chopped peanuts, chia seeds, or flaxseeds can be mixed in for added texture and nutrition.
Are these suitable for children?
They are generally child-friendly, but always check allergy considerations.
Can I use crunchy peanut butter?
Yes, it adds an appealing crunch to the mixture.
How do I get perfectly round peanut butter balls?
Using a small cookie scoop ensures uniform sizing and easier rolling.
Conclusion
Peanut Butter Balls are a timeless treat that blend simplicity with rich, satisfying flavor. This no-bake recipe is adaptable, efficient, and ideal for any occasion. With only a handful of pantry staples and minimal effort required, these treats deliver consistent results every time. Whether enjoyed as a quick snack, a festive dessert, or a make-ahead bite for busy weeks, they offer both comfort and versatility. Their customizable nature means you can easily tailor them to your preferences, making them a recipe you will return to again and again.
Hungry for more? Visit our website for full recipes and follow us on Pinterest for daily foodie inspo you’ll love to pin!