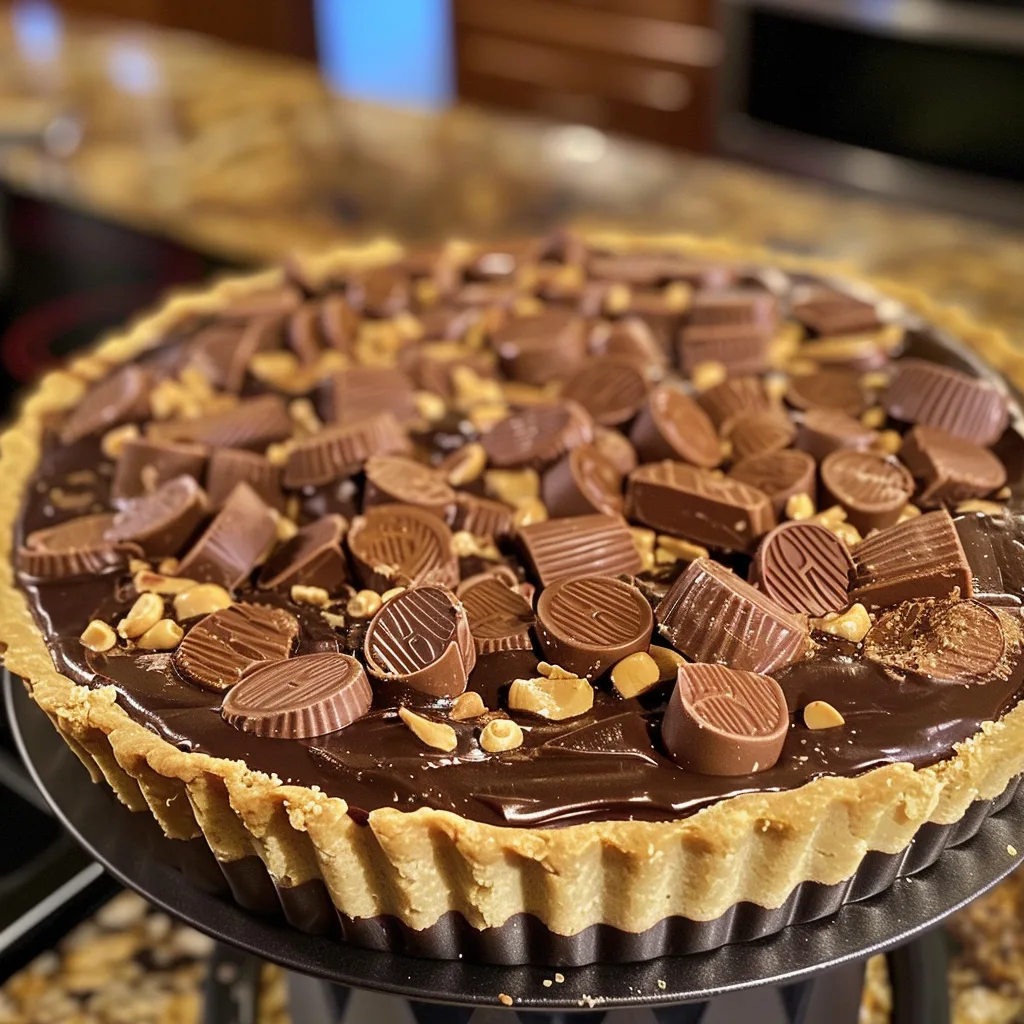
If you’re a fan of the irresistible combination of chocolate and peanut butter, this Reese’s Peanut Butter Cup Pie is about to become your ultimate dessert obsession. It’s rich, creamy, and absolutely indulgent, featuring a silky peanut butter filling nestled in a chocolate cookie crust and topped with whipped cream and chopped peanut butter cups. I made this pie for a family gathering last summer, and it vanished within minutes—everyone wanted seconds. The best part? It’s no-bake, meaning you can whip it up with minimal effort and let the refrigerator do the work. Every bite delivers that perfect mix of sweet, salty, and chocolatey bliss that Reese’s lovers can’t resist.
Why You’ll Love This Recipe
This pie combines the best of convenience and decadence. It’s easy enough for a weekday dessert but impressive enough for parties or holidays. The no-bake crust saves time, and the creamy filling comes together in minutes with just a mixer. It’s a crowd-pleaser that requires no fancy skills, and the flavor? Absolutely heavenly. Creamy peanut butter, rich chocolate, and a touch of salt blend seamlessly for a dessert that tastes like a giant Reese’s cup—only better.
Print
Reese’s Peanut Butter Cup Pie: A Decadent No-Bake Dessert Dream
- Total Time: 2 hrs 20 mins (including chilling)
- Yield: 8 servings
- Diet: Vegetarian
Description
An indulgent no-bake Reese’s Peanut Butter Cup Pie made with a creamy peanut butter filling, rich chocolate ganache, and a crunchy Oreo crust, topped with chopped Reese’s cups for the ultimate dessert treat.
Ingredients
- 24 Oreo cookies, finely crushed
- 1/2 cup unsalted butter, melted
- 1 cup creamy peanut butter
- 8 oz cream cheese, softened
- 1 cup powdered sugar
- 1 teaspoon vanilla extract
- 1 1/2 cups whipped topping (like Cool Whip)
- 1 cup heavy cream
- 1 cup semi-sweet chocolate chips
- 8–10 mini Reese’s Peanut Butter Cups, chopped (for topping)
Instructions
- In a medium bowl, mix crushed Oreo cookies with melted butter until well combined. Press the mixture firmly into the bottom and sides of a 9-inch pie dish to form the crust. Chill in the refrigerator for at least 30 minutes.
- In a large bowl, beat peanut butter, cream cheese, powdered sugar, and vanilla extract until smooth and creamy.
- Fold in the whipped topping until fully incorporated and the mixture is light and fluffy.
- Spread the peanut butter filling evenly over the chilled crust. Refrigerate while you make the chocolate ganache.
- To make the ganache, heat heavy cream in a small saucepan until just simmering, then pour over chocolate chips in a bowl. Let sit for 1 minute, then whisk until smooth and glossy.
- Pour the chocolate ganache over the peanut butter layer and spread evenly with a spatula.
- Top with chopped Reese’s cups and refrigerate for at least 2 hours or until set.
- Slice and serve chilled. Store leftovers covered in the refrigerator.
Notes
- You can use a store-bought Oreo crust to save time.
- Freeze the pie for a firmer texture before serving on hot days.
- Try using crunchy peanut butter for added texture.
- Top with extra whipped cream or drizzle with chocolate syrup for a decadent finish.
- Prep Time: 20 mins
- Cook Time: 0 mins
- Category: Dessert
- Method: No-Bake
- Cuisine: American
Ingredients
(Tip: You can find the complete list of ingredients and their measurements in the recipe card below.)
Every component of this pie contributes to its irresistible texture and flavor. Here’s what you’ll need:
Chocolate cookie crust – A base made from crushed chocolate cookies (like Oreos) mixed with melted butter. It’s the perfect contrast to the creamy peanut butter filling. You can make it from scratch or use a store-bought crust.
Cream cheese – Adds tang and structure to the filling, helping it stay firm yet luscious. Make sure it’s softened to mix easily.
Peanut butter – The star of the show. Use creamy peanut butter for a smooth, rich texture. I’ve tried natural peanut butter before—it works, but the consistency is slightly looser.
Powdered sugar – Sweetens the filling and keeps it silky without becoming grainy.
Whipped topping or heavy cream – Adds lightness and a mousse-like texture to the peanut butter layer. If you prefer homemade, whip heavy cream with a touch of sugar until soft peaks form.
Mini Reese’s Peanut Butter Cups – Chopped and folded into the filling for extra bursts of chocolate-peanut flavor in every bite.
Chocolate ganache (optional but highly recommended) – Made from melted chocolate and cream, drizzled over the top for an elegant finish.
Crushed peanuts or chocolate shavings – A final garnish that adds crunch and visual appeal.
Directions
Prepare the crust first. In a bowl, mix crushed chocolate cookies with melted butter until well combined. Press the mixture firmly into the bottom and sides of a 9-inch pie dish. Chill in the refrigerator while you prepare the filling.
In a large mixing bowl, beat softened cream cheese and peanut butter together until smooth and creamy. Add powdered sugar and beat until fully incorporated.
Fold in the whipped topping or whipped cream gently until the mixture becomes light and fluffy. Stir in chopped mini Reese’s Peanut Butter Cups.
Spoon the filling into the chilled crust, smoothing the top with a spatula. Refrigerate for at least 4 hours, or until firm.
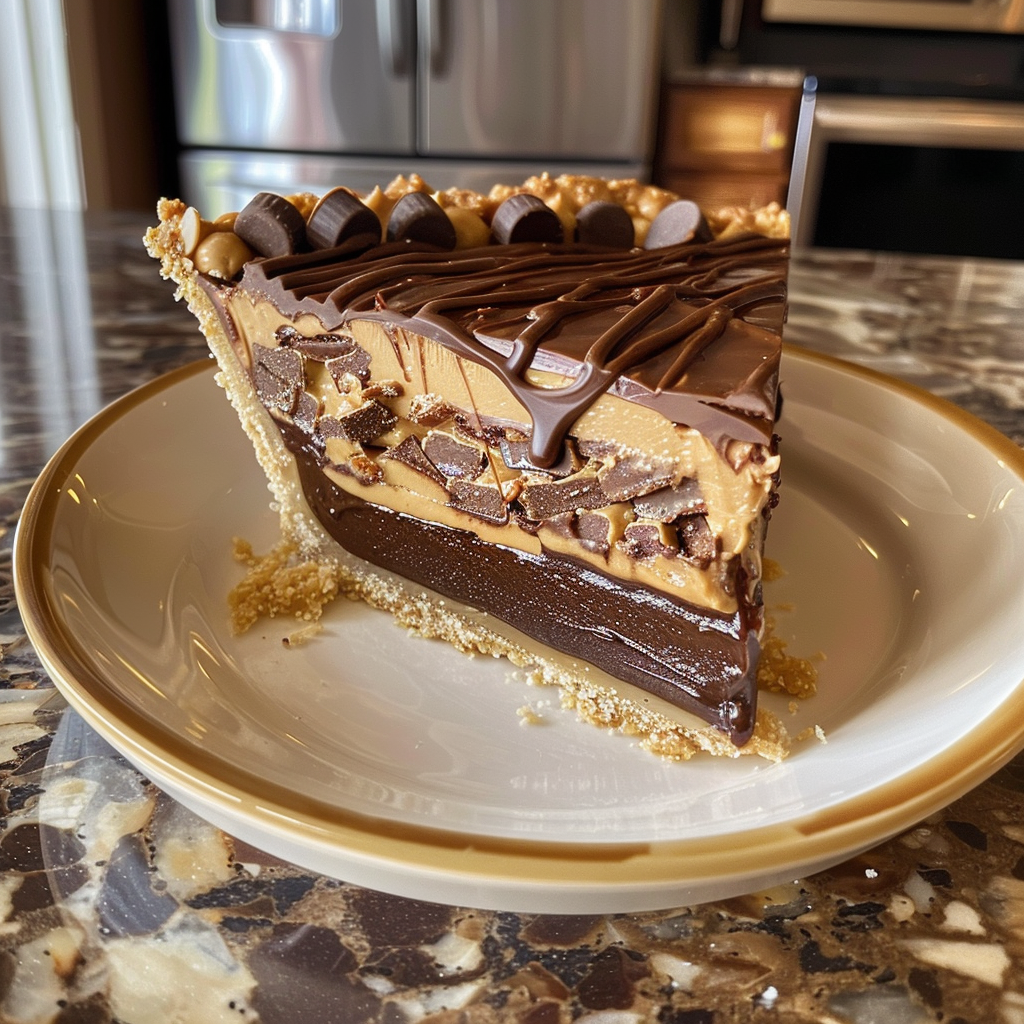
For the topping, drizzle chocolate ganache over the pie and garnish with more chopped Reese’s cups, peanuts, or chocolate curls. Slice and serve chilled.
Equipment needed :
Must-Have Tools to Get Rolling
Here’s what you’ll want to have on hand:
Silicone Spatula – Durable, heat-resistant silicone spatula perfect for mixing, scraping, and spreading. Gentle on non-stick cookware and easy to clean.
Large pot – You’ll need this to boil the whole cabbage head and soften the leaves.
large bowl –Spacious, durable large bowl ideal for mixing, serving, or food preparation. Made from sturdy material and easy to clean.
Sharp knife – For coring the cabbage and slicing out the thick stem in each leaf. A paring knife works best.
Mixing bowl – A big bowl makes it easier to combine your meat and rice filling evenly.
Cutting board – For prepping cabbage leaves and rolling them like a pro.
9×13-inch baking dish – Ideal size to fit your rolled cabbage leaves snugly and prevent them from unraveling.
knife – A sharp, durable kitchen knife perfect for slicing, chopping, and dicing with ease
Servings and timing
This recipe serves 8–10 people.
Preparation time: 20 minutes
Chilling time: 4 hours
Total time: 4 hours 20 minutes
Storage/reheating
Store the pie in the refrigerator, covered, for up to 5 days. For longer storage, freeze for up to 1 month—just thaw in the fridge before serving. Since it’s a no-bake pie, reheating isn’t necessary. Serve it chilled for the best flavor and texture.
Variations and Customizations
Chocolate Lover’s Version
Add a layer of chocolate ganache between the crust and peanut butter filling for double the indulgence.
Crunchy Peanut Butter Pie
Use crunchy peanut butter or fold in crushed peanuts for added texture.
Frozen Peanut Butter Pie
Freeze the whole pie and serve it semi-frozen for an ice-cream-like treat in summer.
Oreo Peanut Butter Pie
Replace the chocolate crust with an Oreo crust and top with crushed Oreos for a fun twist.
Nutella Swirl
Drizzle Nutella into the filling before chilling for a chocolate-hazelnut surprise.
Salted Caramel Topping
Drizzle salted caramel over the top before serving for a sweet-and-salty upgrade.
Mini Pie Version
Make individual mini pies using cupcake liners—perfect for parties and portion control.
Vegan Adaptation
Use dairy-free cream cheese, coconut whipped cream, and vegan peanut butter cups for a plant-based treat.
FAQs
1. Can I use natural peanut butter?
Yes, but the filling may be softer. Stir it well before using to reduce oil separation.
2. What kind of crust works best?
A chocolate cookie or Oreo crust complements the peanut butter filling perfectly.
3. Can I use homemade whipped cream instead of store-bought topping?
Absolutely! Freshly whipped cream adds a lighter, more luxurious texture.
4. How long does it need to chill?
At least 4 hours, but overnight gives the best consistency.
5. Can I make this pie ahead of time?
Yes, it’s perfect for preparing a day in advance—it tastes even better the next day.
6. Do I need to bake the crust?
No, it’s a no-bake recipe, though you can bake the crust for 8 minutes if you prefer a firmer texture.
7. Can I freeze Reese’s Peanut Butter Cup Pie?
Yes, it freezes beautifully. Just wrap tightly and thaw in the fridge before serving.
8. How can I make it less sweet?
Use less powdered sugar and dark chocolate for a more balanced flavor.
9. What can I substitute for cream cheese?
Mascarpone cheese works well for a slightly milder flavor.
10. How do I get clean slices?
Use a sharp knife dipped in hot water, wiping it clean between cuts.
Conclusion
Reese’s Peanut Butter Cup Pie is the ultimate dessert for chocolate and peanut butter lovers alike. With its creamy filling, crunchy crust, and indulgent toppings, it’s pure bliss in every bite. The no-bake method makes it quick, simple, and foolproof—ideal for holidays, celebrations, or anytime you crave a decadent treat. Whether you stick to the classic version or experiment with one of the fun variations, this pie is sure to become a family favorite that disappears as soon as it’s served.
Hungry for more? Visit our website for full recipes and follow us on Pinterest for daily foodie inspo you’ll love to pin!