
Introduction
If you’re looking for a dessert that is both visually stunning and irresistibly delicious, these Strawberry Crunch Cheesecake Tacos are exactly what you need. They combine the rich, creamy texture of cheesecake with the nostalgic crunch of strawberry shortcake crumble, all wrapped in a crispy taco shell. It’s a playful twist on classic desserts that feels both indulgent and fun.
I first tried making these on a weekend when I wanted something different from traditional cheesecake, and honestly, they turned out better than expected. The contrast between the smooth filling and the crunchy coating is what truly makes this dessert shine. Plus, they are surprisingly easy to assemble, making them perfect for gatherings, celebrations, or even a sweet personal treat.
Whether you’re a cheesecake lover or just craving something unique, these tacos will quickly become a favorite in your dessert rotation.
Why You’ll Love This Recipe
These strawberry crunch cheesecake tacos are creamy, crunchy, and incredibly easy to make, offering a perfect balance of textures and flavors in every bite.
Print
Strawberry Crunch Cheesecake Tacos – The Ultimate Creamy & Crunchy Dessert Treat
- Total Time: 30 minutes
- Yield: 10 tacos
- Diet: Vegetarian
Description
Delicious strawberry crunch cheesecake tacos featuring crispy taco shells filled with creamy cheesecake filling and topped with a sweet strawberry crunch topping.
Ingredients
- 10 small flour tortillas
- 2 cups crushed golden sandwich cookies
- 1 cup freeze-dried strawberries, crushed
- 1/2 cup unsalted butter, melted
- 2 cups cream cheese, softened
- 1 cup powdered sugar
- 1 teaspoon vanilla extract
- 1 1/2 cups heavy whipping cream
- 1 cup fresh strawberries, diced
- 1/4 cup granulated sugar
Instructions
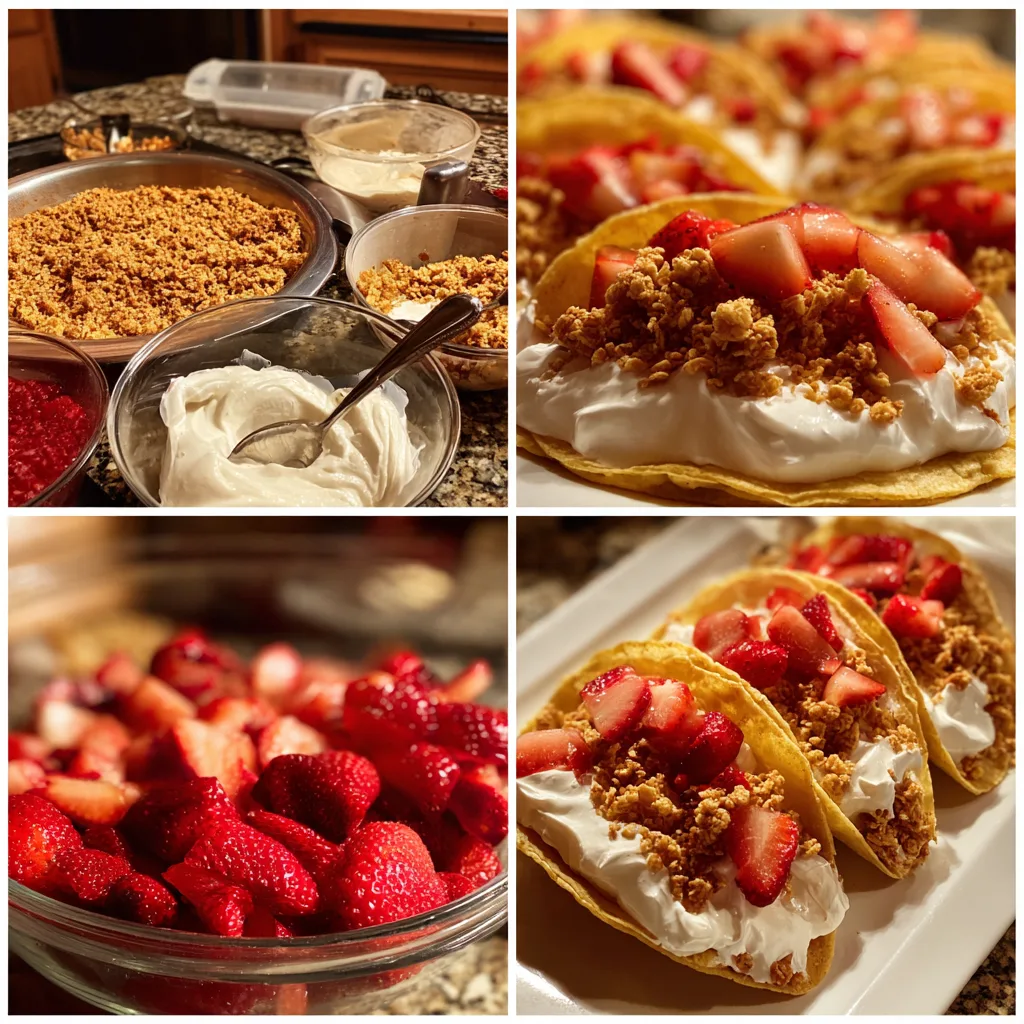
- Preheat oven to 180°C (350°F). Shape tortillas over oven-safe racks to form taco shells and bake for 8–10 minutes until crispy. Let cool.
- In a bowl, mix crushed cookies, freeze-dried strawberries, and melted butter until combined. Set aside.
- In a large bowl, beat cream cheese, powdered sugar, and vanilla extract until smooth.
- In another bowl, whip heavy cream until stiff peaks form, then gently fold into the cream cheese mixture.
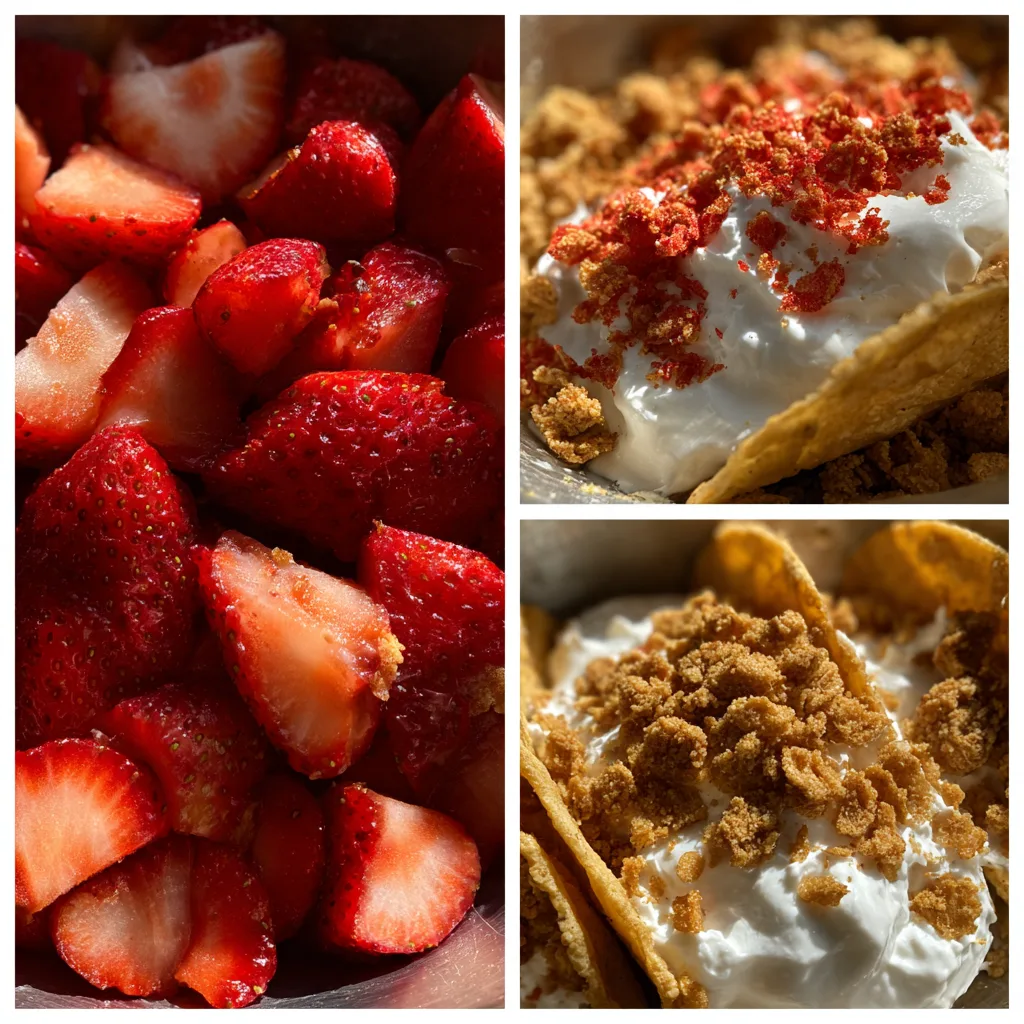
- In a small bowl, combine diced strawberries with granulated sugar and let sit for 10 minutes.
- Fill each taco shell with cheesecake filling.
- Add sweetened strawberries on top.
- Sprinkle generously with strawberry crunch mixture.
- Serve immediately or chill for 30 minutes before serving.
Notes
- You can use store-bought taco shells for convenience.
- Chill the filling before piping for easier handling.
- Best served fresh to maintain crunchiness.
- Adjust sugar based on sweetness preference.
- Prep Time: 20 minutes
- Cook Time: 10 minutes
- Category: Dessert
- Method: Baking
- Cuisine: American
Ingredients
(Tip: You can find the complete list of ingredients and their measurements in the recipe card below.)
Cream Cheese
This is the heart of the cheesecake filling, providing a rich, smooth, and slightly tangy base that makes the dessert irresistibly creamy.
Powdered Sugar
It sweetens the filling while keeping it silky and lump-free, blending perfectly with the cream cheese.
Vanilla Extract
A small addition that enhances the overall flavor, giving the cheesecake filling a warm and comforting aroma.
Heavy Whipping Cream
Whipped into soft peaks, it lightens the filling and creates that airy, mousse-like texture that melts in your mouth.
Golden Oreos or Vanilla Sandwich Cookies
These form the base of the crunchy coating, delivering a buttery and slightly sweet flavor that pairs beautifully with strawberries.
Freeze-Dried Strawberries or Strawberry Gelatin Mix
This is what gives the signature strawberry crunch coating its vibrant color and fruity punch.
Butter
Used to coat and crisp the taco shells, adding a rich flavor and helping the crunch mixture stick perfectly.
Soft Tortillas
These are shaped and baked into taco shells, becoming crisp and golden, creating the perfect vessel for the creamy filling.
Fresh Strawberries
Sliced and added on top for a juicy, fresh burst of flavor that balances the richness of the cheesecake.
Directions
Start by preparing the taco shells. Lightly brush both sides of the tortillas with melted butter, then drape them over oven-safe racks or mold them between muffin tins to create that classic taco shape. Bake until they are golden and crisp, then let them cool completely.
Next, make the strawberry crunch coating. Crush the cookies into fine crumbs and mix them with crushed freeze-dried strawberries or strawberry powder. Set this aside.
For the cheesecake filling, beat the cream cheese until smooth and fluffy. Add powdered sugar and vanilla extract, mixing until fully incorporated. In a separate bowl, whip the heavy cream until soft peaks form, then gently fold it into the cream cheese mixture to create a light and airy texture.
Once the taco shells are cooled, brush the outer surface lightly with melted butter and press them into the strawberry crunch mixture so it sticks evenly.
Finally, pipe or spoon the cheesecake filling into each shell and top with fresh strawberry slices. Serve immediately for the best texture and flavor.
Equipment needed : Must-Have Tools to Get Rolling
Must-Have Tools to Get Rolling
Here’s what you’ll want to have on hand:
Silicone Spatula – Durable, heat-resistant silicone spatula perfect for mixing, scraping, and spreading. Gentle on non-stick cookware and easy to clean.
Large pot – You’ll need this to boil the whole cabbage head and soften the leaves.
large bowl –Spacious, durable large bowl ideal for mixing, serving, or food preparation. Made from sturdy material and easy to clean.
Sharp knife – For coring the cabbage and slicing out the thick stem in each leaf. A paring knife works best.
Mixing bowl – A big bowl makes it easier to combine your meat and rice filling evenly.
Cutting board – For prepping cabbage leaves and rolling them like a pro.
Full-Size Blender – is a powerful kitchen appliance for making smoothies, soups, and sauces in large batches.
3-in-1 Air Fryer – This versatile 3-in-1 air fryer offers Air Fry for healthier meals with less oil, Bake for bakery-quality desserts and treats, and Reheat to bring leftovers back to life with crispy, flavorful results
Servings and timing
This recipe makes approximately 8 tacos, requires about 20 minutes of preparation time, 10 minutes of baking, and 30 minutes of chilling for best results.
Storage/reheating
Store assembled tacos in the refrigerator for up to 2 days, but for best texture, keep the shells and filling separate and assemble just before serving; reheating is not recommended as it may soften the shells.
Variations and Customizations
One of the best things about strawberry crunch cheesecake tacos is how versatile they are. You can easily adapt them to suit your taste preferences or dietary needs.
For a chocolate twist, try adding cocoa powder to the cheesecake filling or drizzle melted chocolate over the finished tacos. The combination of chocolate and strawberry is always a winning choice.
If you prefer a lighter version, you can substitute the cream cheese with a reduced-fat option and use whipped topping instead of heavy cream. I once tried this with a lighter version, and it still turned out delicious, just slightly less rich.
You can also experiment with different fruit flavors. Replace strawberries with raspberries, blueberries, or even mango for a tropical variation. Simply swap out the freeze-dried fruit in the crunch mixture to match your chosen flavor.
For added texture, consider mixing crushed nuts like almonds or pecans into the crunch coating. This gives an extra layer of crunch and a slightly nutty flavor.
If you want to make them gluten-free, use gluten-free cookies and tortillas. The result is just as tasty and perfect for those with dietary restrictions.
These tacos can also be turned into mini dessert bites by using smaller tortillas or even cookie cups for a party-friendly presentation.
Nutrition and Dietary Info
Below is an approximate nutritional breakdown per serving:
| Nutrient | Amount |
|---|---|
| Calories | 320 kcal |
| Protein | 4 g |
| Carbs | 28 g |
| Fat | 22 g |
| Saturated Fat | 13 g |
| Fiber | 1 g |
| Sugar | 18 g |
| Sodium | 180 mg |
Expert Tips & Customizations
Use room temperature cream cheese
This ensures a smooth, lump-free filling.
Do not overwhip the cream
Stop at soft peaks to keep the texture light and airy.
Chill before serving
A short chill helps the filling set and improves flavor.
Coat shells evenly
Press gently but firmly so the crunch sticks well.
Serve immediately after filling
This keeps the shells crisp and prevents sogginess.
FAQs
Can I make these ahead of time?
Yes, but store the shells and filling separately and assemble just before serving.
Can I use store-bought taco shells?
You can, but homemade shells provide a better texture and flavor.
What can I use instead of freeze-dried strawberries?
Strawberry gelatin mix works well as an alternative.
How do I keep the shells from getting soggy?
Only fill them right before serving and avoid overfilling.
Can I freeze these tacos?
It’s not recommended, as the texture of the filling and shells may change.
Can I use whipped topping instead of heavy cream?
Yes, it’s a convenient substitute and still delivers a creamy result.
Conclusion
Strawberry Crunch Cheesecake Tacos are the perfect fusion of fun and flavor, combining creamy cheesecake filling with a crispy, fruity coating. They are easy to make, customizable, and guaranteed to impress anyone who tries them. Whether you’re preparing them for a special occasion or simply treating yourself, these delightful dessert tacos are sure to become a go-to favorite in your kitchen.
Hungry for more? Visit our website for full recipes and follow us on Pinterest for daily foodie inspo you’ll love to pin!