
Introduction
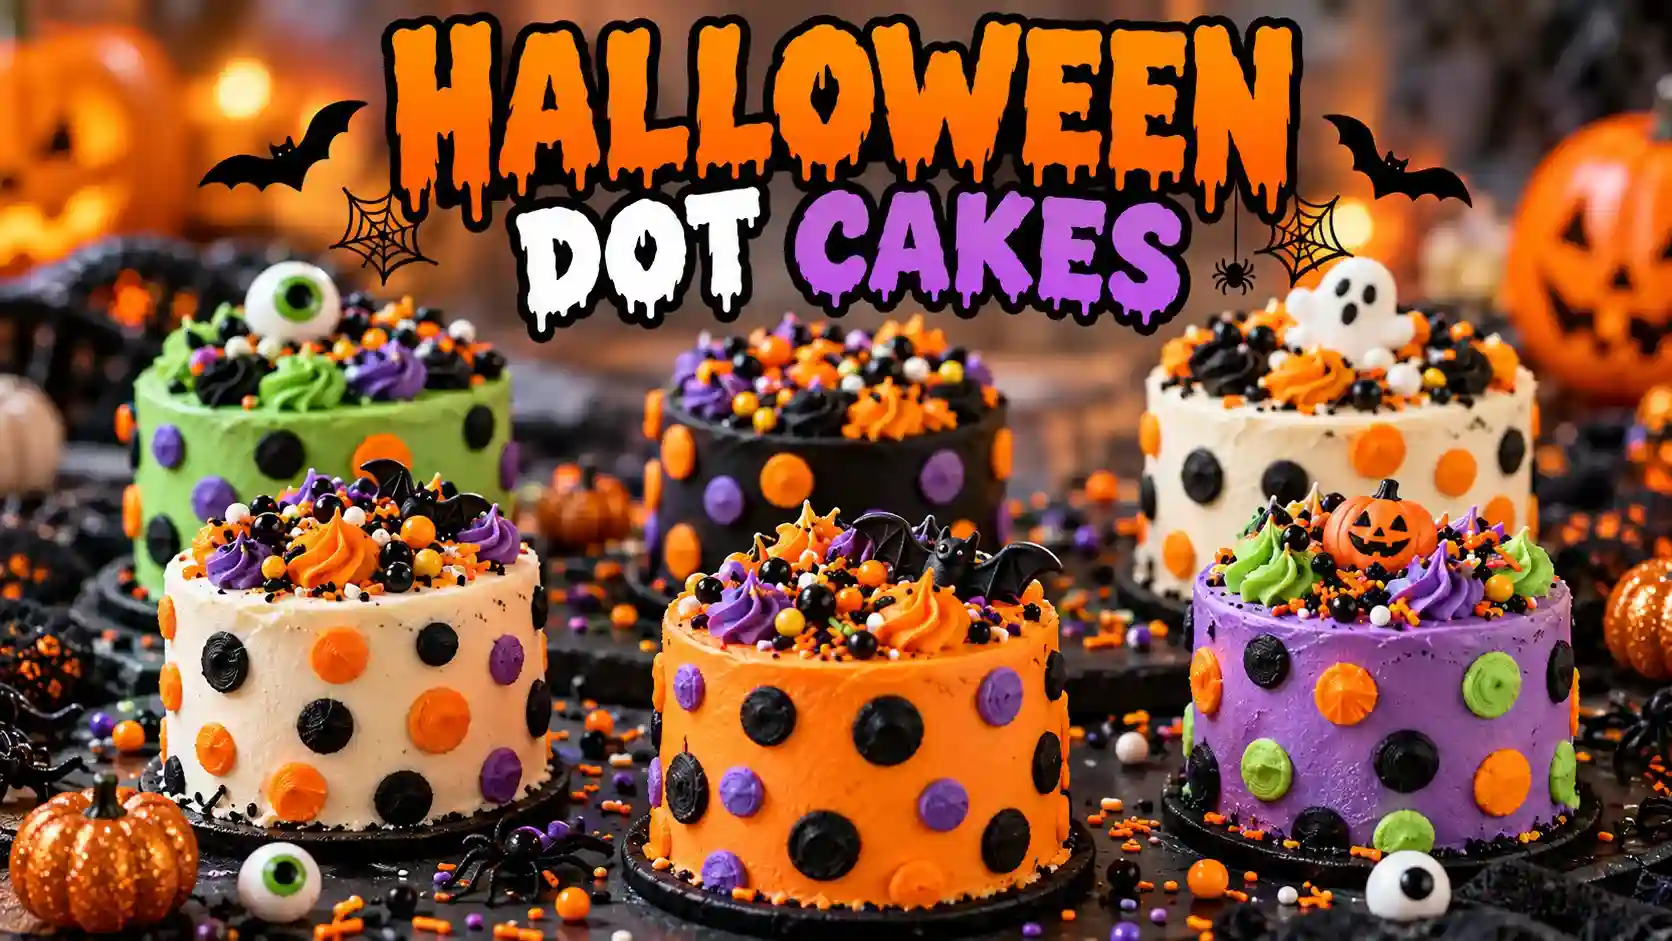
Halloween is the perfect time to get creative in the kitchen, and these Halloween dot cakes are a fun, colorful treat that brings a little magic to your dessert table. With soft, fluffy cake, creamy frosting, and playful dots of orange, black, purple, and green, these festive cakes are ideal for Halloween parties, school celebrations, family gatherings, or a cozy night of spooky baking at home.
What makes dot cakes so appealing is their simple design. You do not need professional decorating skills or expensive equipment to create something that looks impressive. A basic cake batter, a few drops of food coloring, and some colorful frosting are enough to turn ordinary mini cakes into eye-catching Halloween desserts.
I especially love how easy these cakes are to customize. You can make bright orange dots for a classic Halloween look, add purple and green for a playful twist, or use black-and-orange decorations for a more traditional spooky theme. Each cake can have its own unique pattern, making the decorating process enjoyable for both adults and children.
Whether you are an experienced baker or trying a new Halloween recipe for the first time, these Halloween dot cakes are a delicious way to celebrate the season. They are soft, sweet, festive, and wonderfully easy to share.
Why You’ll Love This Recipe
- Perfect for Halloween: The colorful dots and festive decorations make these cakes a natural fit for spooky celebrations.
- Easy to make: The recipe uses everyday baking ingredients and straightforward instructions.
- Beautiful presentation: Bright colors create a playful dessert that looks attractive on party tables.
- Kid-friendly activity: Children can help add sprinkles and decorate cooled cakes with adult supervision.
- Customizable colors: Choose orange, black, purple, green, or any combination that matches your Halloween theme.
- Soft and fluffy texture: A tender cake crumb pairs beautifully with creamy frosting.
- Great for parties: Individual mini cakes are easy to serve, package, and share with guests.
Ingredients
(Tip: You can find the complete list of ingredients and their measurements in the recipe card below.)
Ingredients Breakdown
All-Purpose Flour
All-purpose flour forms the structure of these Halloween dot cakes. It gives the batter enough stability to rise while keeping the finished cakes soft and tender. Measure the flour carefully by spooning it into your measuring cup and leveling the top rather than packing it tightly. Too much flour can make the cakes dry or dense.
Granulated Sugar
Sugar adds sweetness and helps create a delicate cake texture. When beaten with butter, it helps incorporate air into the mixture, contributing to a lighter crumb. It also encourages browning during baking. Regular white granulated sugar works well for this recipe.
Unsalted Butter
Butter adds richness, flavor, and moisture to the cake. Softened butter is easier to cream with sugar, helping create a smooth, airy mixture. Allow the butter to reach room temperature before mixing, but avoid melting it, as melted butter can change the cake’s texture.
Eggs
Eggs bind the ingredients together and help the cakes rise. They also contribute moisture, structure, and richness. Room-temperature eggs blend more easily into the butter mixture, reducing the chance of a curdled-looking batter.
Milk
Milk helps loosen the batter and keeps the cakes tender. Whole milk provides a rich flavor, but you can also use another dairy milk with a similar consistency. Add it gradually and avoid overmixing after the flour is incorporated.
Baking Powder
Baking powder provides the lift needed to create fluffy mini cakes. Make sure it is fresh and evenly distributed throughout the dry ingredients. Too much can cause the cakes to rise quickly and then collapse.
Vanilla Extract
Vanilla gives the cakes a warm, sweet aroma that complements the butter and sugar. Pure vanilla extract is a lovely option, although imitation vanilla can also work.
Salt
A small amount of salt balances the sweetness and enhances the other flavors. Even in desserts, salt plays an important role in creating a more rounded taste.
Gel Food Coloring
Gel food coloring creates the bright orange, purple, green, and black details that make these cakes festive. Gel colors are generally useful because they provide strong color without adding much liquid to the batter or frosting. Add a little at a time until you reach your preferred shade.
Powdered Sugar
Powdered sugar forms the base of a smooth, creamy buttercream frosting. Its fine texture helps it blend easily with softened butter. Sifting it first can reduce lumps and make decorating easier.
Heavy Cream or Milk
A small amount of cream or milk adjusts the frosting to the right consistency. Add it gradually so the frosting becomes smooth and spreadable without turning runny.
Halloween Sprinkles
Halloween sprinkles add texture, color, and a festive finishing touch. Choose tiny pumpkins, stars, candy eyes, or orange-and-black sugar decorations to complement the dot pattern.
How to Make Halloween Dot Cakes
Step 1: Prepare the Baking Equipment
Preheat your oven to 350°F (175°C). Grease a mini cake pan or line a standard muffin pan with paper liners if you are making individual portions. For larger individual cakes, use small round cake pans. Preparing the pans before mixing the batter helps you transfer it quickly and evenly.
Step 2: Combine the Dry Ingredients
In a medium bowl, whisk together the flour, baking powder, and salt. Mixing these ingredients first helps distribute the raising agent evenly, reducing the chance of unevenly risen cakes.
Step 3: Cream the Butter and Sugar
In a separate bowl, beat the softened butter and granulated sugar until the mixture looks pale and fluffy. This usually takes approximately two to three minutes with an electric mixer. Scrape down the sides of the bowl as needed to ensure everything is incorporated.
Step 4: Add the Eggs and Vanilla
Add the eggs one at a time, beating after each addition. Stir in the vanilla extract. If the mixture looks slightly curdled, do not worry; adding the dry ingredients gradually should help bring the batter together.
Step 5: Finish the Batter
Add the flour mixture in batches, alternating with the milk. Begin and finish with the dry ingredients, mixing just until combined. Avoid beating the batter excessively because overmixing can develop too much gluten and produce a tougher cake.
Step 6: Create the Colorful Dots
Divide a small portion of the batter into separate bowls if you want colored dots inside the cakes. Add a little orange, purple, or green gel food coloring to each bowl and mix gently.
Transfer each colored batter into a small piping bag or a zip-top bag with a tiny corner snipped off. Fill the prepared cake cavities with the plain batter, then pipe small dots of colored batter into each portion. You can also create colored dots on the surface of a cake before baking, depending on the design you prefer.
Keep the dots relatively small and evenly spaced. Too much colored batter can affect the cake’s texture or create large patches instead of neat dots.
Step 7: Bake the Cakes
Bake the cakes until they are lightly golden and a toothpick inserted into the center comes out clean or with a few moist crumbs. Mini cakes and cupcakes may take approximately 12–20 minutes, while larger individual cakes may need longer. Start checking early because baking times vary with pan size.
Allow the cakes to cool in their pans for about five minutes, then transfer them to a wire rack. Let them cool completely before decorating.
Step 8: Prepare the Frosting
Beat softened butter until smooth. Gradually add powdered sugar, followed by vanilla extract and a small amount of cream or milk. Beat until the frosting is creamy and holds its shape.
Divide the frosting into separate bowls if you want several colors. Tint each portion with gel food coloring, keeping some white frosting for contrast if desired.
Step 9: Decorate the Halloween Dot Cakes
Spread or pipe frosting over the completely cooled cakes. Add tiny dots of contrasting frosting, or pipe colorful dots around the edges and tops. Finish with Halloween sprinkles, candy eyes, or a few decorative sugar shapes.
For a clean design, use a small round piping tip. If you do not have piping tips, a zip-top bag with a small cut in the corner works well.
Step 10: Serve and Enjoy
Arrange the finished cakes on a Halloween-themed platter or cake stand. You can use alternating colors to create a coordinated display or decorate every cake differently for a playful party presentation.
For the best texture, serve the cakes at room temperature. Their tender crumb, creamy frosting, and colorful decorations make them a delightful addition to any Halloween dessert spread.
Common Mistakes to Avoid
1. Using Cold Ingredients
Cold eggs and butter can make the batter harder to mix evenly. Bring the butter and eggs to room temperature before starting for a smoother mixture.
2. Overmixing the Batter
Once you add the flour, mix only until the ingredients are combined. Excessive mixing can make the cakes dense or chewy rather than soft and fluffy.
3. Adding Too Much Food Coloring
A small amount of gel food coloring is usually enough to create vivid shades. Adding too much liquid coloring can change the consistency of the batter or frosting.
4. Making the Dots Too Large
Large portions of colored batter can create uneven patterns and affect how the cakes bake. Use a small piping opening and add neat, controlled dots.
5. Overfilling the Cake Pans
Leave enough room for the batter to rise. Overfilled pans can produce uneven cakes, overflow, or rounded tops that are harder to decorate.
6. Frosting Warm Cakes
Warm cake can melt buttercream, causing the decorations to slide or lose their shape. Always allow the cakes to cool completely before applying frosting.
7. Adding Too Much Liquid to the Frosting
Thin frosting is difficult to pipe and may run down the sides of the cakes. Add milk or cream a teaspoon at a time until the frosting reaches the desired consistency.
8. Baking Without Checking for Doneness
Mini cakes can bake quickly. Begin checking them early, and remove them once a toothpick comes out clean or with a few moist crumbs.
Equipment Needed
You only need a few basic baking tools to prepare, bake, and decorate these colorful Halloween dot cakes.
Must-Have Tools to Get Rolling
Here’s what you’ll want to have on hand:
- Mixing bowls
- Electric hand mixer or stand mixer
- Measuring cups and spoons
- Kitchen scale, if available
- Whisk
- Rubber spatula
- Mini cake pan, cupcake pan, or small round cake pans
- Parchment paper or paper liners
- Wire cooling rack
- Piping bags or zip-top bags
- Small round piping tips, optional
- Toothpick or cake tester
- Offset spatula or butter knife
- Small bowls for coloring
- Halloween serving platter
Servings and Timing
This recipe makes approximately 12 mini cakes or cupcakes, depending on the size of your pan.
| Detail | Estimated Time |
|---|---|
| Servings | 12 mini cakes |
| Prep Time | 25 minutes |
| Cook Time | 15–20 minutes |
| Cooling Time | 30 minutes |
| Decorating Time | 15 minutes |
| Total Time | Approximately 1 hour 25 minutes |
These estimates assume that the ingredients are ready to use and that the cakes are baked in a mini cake or cupcake pan. Larger cakes may require additional baking time.
Storage and Reheating
Store the Halloween dot cakes in an airtight container. Because they contain buttercream and may include dairy-based decorations, refrigerate them if your frosting or toppings require refrigeration. In general, refrigerating buttercream-decorated cakes is a practical option, especially in warm weather.
For the best flavor and texture, allow refrigerated cakes to sit at room temperature briefly before serving, provided they remain within safe food-handling limits. Avoid leaving perishable frosting at room temperature for extended periods.
Unfrosted cakes can be frozen in airtight wrapping for up to two to three months for good quality. Thaw them in the refrigerator or at room temperature while still wrapped, then decorate once completely thawed and dry.
If you have already decorated the cakes, freeze them on a tray until the frosting is firm, then transfer them carefully to a freezer-safe container. Thaw in the refrigerator to minimize condensation and protect the decorations.
These cakes generally do not need reheating. Warming frosted cakes can soften the buttercream and damage the decorative dots.
Variations and Customizations
One of the best things about Halloween dot cakes is that the recipe can be adapted to suit different tastes, color schemes, and party themes. You can keep the cake simple and traditional or turn it into a colorful centerpiece for your Halloween dessert table.
1. Classic Orange and Black Dot Cakes
For a traditional Halloween look, use bright orange dots with black or dark chocolate frosting. You can add black sprinkles, tiny sugar pumpkins, or orange candy pieces. For a less intense black color, use dark cocoa powder in the frosting and add a small amount of black gel coloring if necessary.
2. Purple and Green Halloween Cakes
Purple and green create a playful, spooky combination that works beautifully for witch-themed parties. Use purple cake dots with green frosting, or reverse the colors for a different appearance. A few candy eyes can make the cakes look like friendly little monsters.
3. Chocolate Halloween Dot Cakes
Replace a small portion of the flour with unsweetened cocoa powder, adjusting the dry ingredients carefully to maintain the correct batter consistency. Chocolate cake pairs particularly well with orange buttercream and chocolate sprinkles. You can also use mini chocolate chips as an additional decoration, although they will not produce the same smooth dot effect as colored batter.
4. Vanilla and Strawberry Dot Cakes
If you prefer a milder color palette, keep the cake vanilla and use pink or red dots with white frosting. Add a little strawberry flavoring to the frosting or serve the cakes with fresh berries. This variation is ideal for anyone who wants a festive dessert without the traditional dark Halloween colors.
5. Mini Monster Cakes
Decorate each cake with green frosting, candy eyes, and tiny chocolate details. Use different numbers and sizes of eyes to give every cake its own personality. For younger children, keep the decorations simple and choose appropriately sized edible toppings.
6. Pumpkin-Spice Dot Cakes
Add a small amount of pumpkin pie spice or a combination of cinnamon, ginger, and nutmeg to the dry ingredients. You can also serve the cakes with a pumpkin-spice buttercream. Keep the spice level moderate so it complements rather than overwhelms the vanilla flavor.
7. Gluten-Free Halloween Dot Cakes
Use a reliable gluten-free all-purpose baking blend designed for cakes. If the blend does not contain a binder, follow the manufacturer’s guidance on whether additional xanthan gum is needed. The final texture may vary depending on the flour blend, so test a small batch before baking for a special event.
8. Dairy-Free Halloween Dot Cakes
Replace the butter with a suitable dairy-free baking stick and use an unsweetened plant-based milk. For the frosting, choose a dairy-free butter alternative and check that the food coloring and decorations meet your dietary requirements.
9. Reduced-Sweetness Version
You can make the cakes less sweet by using a lighter layer of frosting and relying on the colorful dots for decoration. Avoid making large reductions to the sugar in the cake batter without testing the recipe, because sugar affects moisture, browning, and texture as well as sweetness.
10. Halloween Party Cake Pops
Crumble fully cooled cakes and mix with a small amount of frosting until the mixture holds together. Shape into small balls, chill until firm, and dip in melted candy coating. Decorate with orange and purple dots or sprinkles. Cake pops are a useful way to repurpose cake that breaks during removal from the pan.
Nutrition and Dietary Info
The nutrition values below are approximate estimates for one mini cake with buttercream frosting. Actual values depend on the exact ingredient quantities, cake size, frosting amount, and decorations used.
| Nutrient | Approximate Amount per Serving |
|---|---|
| Calories | 285 kcal |
| Protein | 3 g |
| Carbohydrates | 39 g |
| Fat | 13 g |
| Saturated Fat | 8 g |
| Fiber | 1 g |
| Sugar | 27 g |
| Sodium | 150 mg |
Dietary Considerations
Vegetarian: The standard recipe is generally suitable for vegetarians, depending on the food coloring and decorations selected.
Dairy-free: Use dairy-free butter alternatives and plant-based milk, and verify that the frosting ingredients are dairy-free.
Gluten-free: Substitute a suitable gluten-free baking blend and check all packaged ingredients for cross-contact warnings if necessary.
Nut-free: The basic recipe does not require nuts, but check the labels on food coloring, sprinkles, and other decorations for allergen information and possible cross-contact.
Sugar-conscious: These are celebratory cakes rather than low-sugar desserts. Smaller portions and lighter frosting can help reduce the sugar and calorie content per serving.
These nutrition estimates are intended as a general guide rather than precise dietary advice. For medically necessary dietary restrictions, calculate the recipe using the specific products and quantities you plan to use.
Expert Tips & Customizations
Use Gel Coloring for Stronger Shades
Gel food coloring is useful for achieving vibrant Halloween colors without adding much liquid. Start with a small amount and build the color gradually.
Keep the Cake Batter Consistent
Mix the plain batter first, then transfer only the amount needed for colored dots into separate bowls. This makes it easier to maintain a uniform base and prevents unnecessary color mixing.
Practice Your Dot Pattern
If you want dots on the cake surface, practice piping on parchment paper first. A small round opening creates more consistent circles, and gentle pressure helps prevent uneven shapes.
Cool Before Decorating
Even a slightly warm cake can soften frosting. Allow the cakes to cool completely before piping colored dots or adding sprinkles.
Choose a Coordinated Color Palette
Two or three colors often look more polished than using every available shade. Orange, black, and purple are classic choices, while green adds a monster-inspired touch.
Prepare Decorations in Advance
Separate your sprinkles, prepare the frosting colors, and arrange your piping bags before decorating. This saves time and makes it easier to work neatly.
Make the Cakes Ahead
Bake the cakes a day in advance and store them in an airtight container. Prepare the frosting closer to decorating time or refrigerate it according to the ingredients used. Bring the frosting to a workable consistency before piping.
Use a Light Hand with Frosting
A thin, even layer of buttercream allows the dot pattern to stand out. If you prefer a sweeter dessert, add extra frosting, but keep the decorations balanced so the cakes are not overly heavy.
FAQs
1. What Are Halloween Dot Cakes?
Halloween dot cakes are festive mini cakes decorated with colorful dots made from tinted batter, frosting, or both. The dots can appear inside the cake, on the surface, or around the frosting. Orange, black, purple, and green are popular Halloween colors.
2. Can I Make Halloween Dot Cakes Without Piping Bags?
Yes. Use a clean zip-top bag with a tiny corner cut off. You can also use a small spoon to add colored batter, although the dots may be less uniform. For frosting decorations, a small resealable bag works well for simple patterns.
3. How Do I Make the Dots Show Up Clearly?
Use contrasting colors and keep the dots relatively small. If you are making dots inside the cake, use colored batter that contrasts with the plain batter. Avoid overmixing after adding the dots, because this can blur the pattern.
4. Can I Make Halloween Dot Cakes Ahead of Time?
Yes. Bake the cakes a day ahead and store them in an airtight container after they cool completely. You can decorate them the next day. If the frosting requires refrigeration, keep the finished cakes chilled and bring them to a suitable serving temperature before eating.
5. Why Did My Halloween Cakes Turn Out Dry?
Dry cakes can result from too much flour, overbaking, or overmixing. Measure the ingredients carefully, check the cakes early, and remove them once a toothpick comes out clean or with a few moist crumbs. Allowing the cakes to cool properly also helps preserve their texture.
6. Can I Use Store-Bought Cake Mix?
Absolutely. A boxed vanilla or white cake mix is a convenient shortcut. Prepare the batter according to the package directions, divide a small amount into bowls for coloring, and create your dot pattern. Bake according to the package instructions, then cool completely before decorating with frosting.
Conclusion
Halloween dot cakes are a delightful way to bring color, creativity, and delicious homemade flavor to your seasonal celebrations. Their soft cake texture, creamy frosting, and playful decorations make them suitable for everything from family baking afternoons to Halloween parties and school treats.
You can keep the design simple with orange and black dots or experiment with purple, green, chocolate, and pumpkin-spice variations. The recipe is flexible enough to suit different decorating skills, making it a wonderful activity for beginners and experienced home bakers alike.
For the best results, measure your ingredients carefully, avoid overmixing the batter, and allow the cakes to cool completely before decorating. A little preparation goes a long way toward creating neat dots and beautifully finished cakes.
Prepare a batch, arrange them on a festive platter, and let everyone choose their favorite design. These Halloween dot cakes are an easy, eye-catching dessert that makes the spooky season even sweeter.